
Previously, I've talked about printing cyanotypes on parchment. It's pretty awesome, because the parchment imparts a remarkable amount of texture that rarely manages to detract from the subject matter. The organic nature of the material, and the fact that I print on scraps instead of properly processed, sized and cut sheets, means that each piece has a different texture, surface, thickness and quality. The scraps I get come from any of four types of parchment (deer, goat, sheep, calf), but I have no way to tell which I'm actually using.
Just to clarify, when I say 'parchment', I do not mean the stuff you buy at the grocery store to bake on. I do not mean the vellum you buy at office stores to put in wedding invitations. It's thin-cut and treated animal skin, the kind of material used in medieval documents and illuminated manuscripts. If you'd like to buy some of your own to play with, I get my supplies from a tannery in New York state: Pergamena.
Eventually I would love to order a full-size skin and do large format cyanotype contact prints, but at the moment that isn't feasible since I don't have a place to work large enough for that, or a way to handle washing, drying and pressing a skin that big. Cyanotypes printed on parchment must deal with the qualities of the material. Parchment, despite being used as paper, behaves very little like paper. It reacts differently to moisture, heat and tension.
So, how do you print cyanotypes on parchment successfully? Let me 'splain to you.
Coating the Parchment
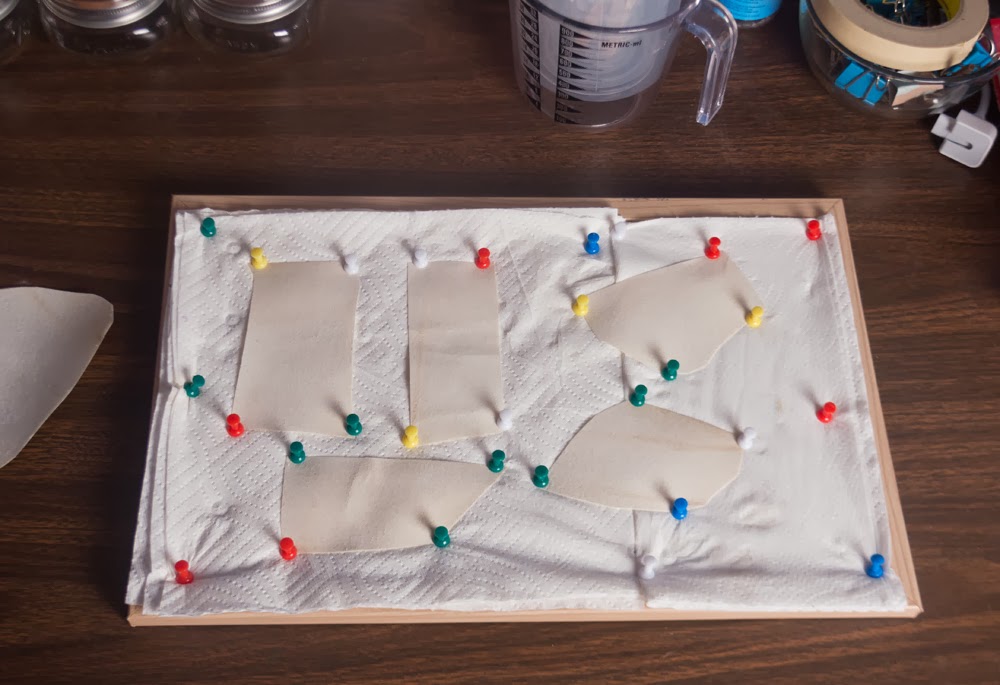 |
| Stretched and pinned parchment sheets |
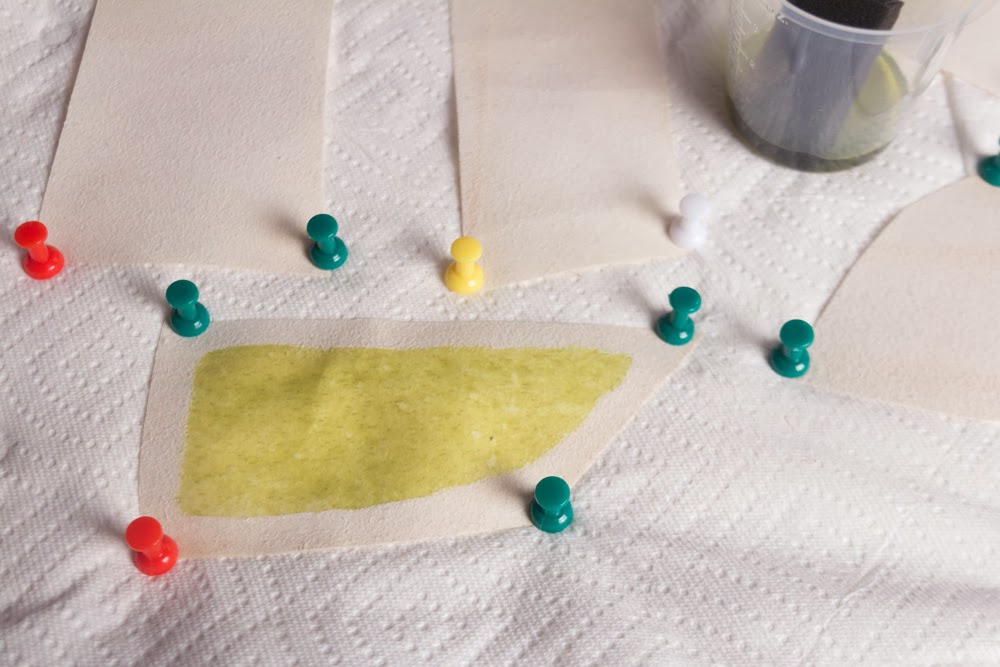 |
| One sheet of parchment coated. |
Drying the Parchment
Once you've coated your parchment, you have to let it dry. As with all cyanotype materials, do this out of light. A warm, dry, dark environment is best if you can manage it. I keep mine in a cabinet. Allow parchment to dry fully, until it retains absolutely no moisture. This may take between 1-2 days depending on your local humidity and temperature. The dry parchment will be stiffer and far less flexible than it was when you started. After being exposed to moisture, the parchment never really gets that soft, flexible feeling back. I've contacted different tanners and they all say they's just how it works. They recommend not wetting your parchment, but obviously that isn't an option for anyone wanting to do photography on it. There's some additional chemicals and steps the tanners themselves use when dyeing and tanning the hide that keeps it supple, but it's not exactly stuff you can do at home (or want to, as it stinks). Just deal with the stiffness of the final product.Exposing the Parchment
Exposure is fairly standard. Close contact between your negative or object and the chemistry is key. Be forewarned that because of the texture, surface quality and stiffness of your parchment, no cyanotype will ever come out as detailed and clear as it will on paper. Ever. It's just a factor of how the parchment is. I don't even try negatives anymore, they were too indistinct and fuzzy for me. I only use parchment to do contact prints with plants and objects.There is one note here to be made: your exposures will be longer than normal. There's something about the parchment that makes it resistant to exposure. Chemistry on parchment doesn't hold detail very well, so you need to really burn it in. It's extremely common to find that your latent image is much more detailed and vibrant than your developed print. Check the example below.
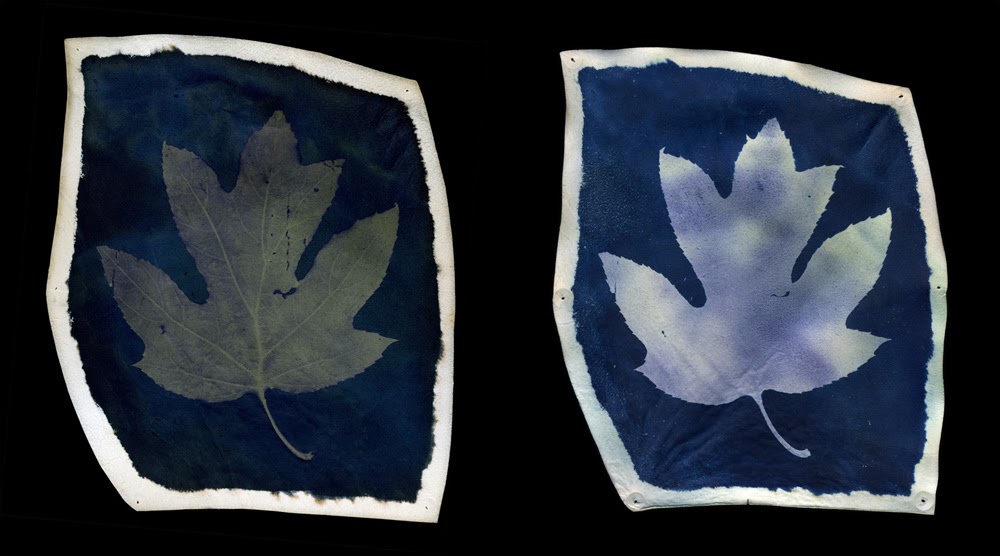 |
| Left: Latent Image. Right: Developed Image. |
Washing the Parchment
Washing (developing) parchment cyanotypes (I call them cyanovellums) is also perfectly simple; just dump them into water and stir them around. They take longer to wash than regular paper, especially if the parchment itself is thick or soft. The thin, hard, slick parchment washes pretty fast and doesn't respond nearly as much to moisture as other types. The problem with washing cyanovellums is that whole issue parchment has with moisture.Drying the Parchment
You can't dry them quickly, and you have to stretch them or they'll curl up like mad. If you try to dry them with an iron, they'll shrivel up like a slug under salt.What you end up doing is drying them in a book, or under weight. Pad both sides of the parchment with towels or something else absorbent, then press the whole thing under heavy weight. Large books do great for this, but they can occasionally transfer ink from their pages onto the parchment. Might be interesting, but more likely to be a distraction from your image. Experiment with that, but go into it expecting to experiment. If you don't want any ink transfer, just put something absorbent between your parchment and the paper.
If you'd rather stretch and dry the parchment, you can do that. You will have to pin through the parchment. There's no way to use the weight of the pushpin's plastic to hold the parchment in place as it dries, like you can try doing while coating. There's too much water in the parchment that has to get out and the curling is going to have some force behind it. Stretch the parchment tight and pin it in place securely. You may choose just to pin the corners, or pin regularly around the sides. Because I don't like having holes in my parchments, I tend to prefer the weighted press method of drying. Stretch-n-pin does offer a bit of a chance to 'cheat' and dry the parchment faster. You can use a hairdryer on low, held several inches from the surface of the parchment, to speed up the drying. Don't hurry too much, even a small parchment will take a good 20 minutes or so, but you can manage it.
Either way, pinning or pressing, if you don't cheat with heat then you can expect it to take 2-3 days to fully dry your parchments. If working during a hot, sunny day then you can leave your press or stretching board outside and let the sun help you dry. That speeds up the process considerably!
Finishing Up
Now, if you've done something wrong, or your parchment just isn't cooperating, you can always re-soak and re-dry the parchment. Just remember, it's never, not ever, going to be as supple and flexible after being washed as it was when you first started.Each cyanovellum is unique. A combination of the hide's texture, size, coloration and surface along with the variations in the cyanotype process itself will create an absolutely individual piece. You can go further and tone your cyanovellums, but the toning processes may not work exactly the same on parchment as they do on paper. For example, most bleaching processes turn cyanovellums golden orange.
Since the tactile appearance of cyanovellums is so striking, I prefer to present mine in shadowboxes. I generally choose a box with a natural wood finish, then cover the back of the box with either a black or natural, unbleached cloth. I use small sheets of cardboard or foamboard to raise the cyanovellums off the background, 'floating' them against the background. Hot glue makes for a good seal and can be easily removed from the back of the parchment without causing damage.
No comments:
Post a Comment