 |
| Print made with lite salt |
Set-up
You can do this process almost anywhere, but you're going to need a flat area to work. If it's an area you care about, first cover it in a plastic tablecloth or protective sheeting. The plastic prevents the nitrate from soaking through a towel and getting on anything important. However, the nirate can slide around on plastic, so to be extra super careful you could put towels or a cloth down on your plastic.
Make sure you have your gloves (to avoid black spots on your nails and hands) and your protective glasses (to avoid eye damage) in place. You don't need to actually put them on until you take out the silver nitrate. I don't 'suit up' until I'm ready for the silver nitrate coating, because the gloves make my fingers clumsy. I always wear my glasses, because without them, I can't see. I have little plastic additions to my glasses that clip on to provide extra eye protection. Goggles just fog up on me and hurt my face. Whatever method you use to protect your eyes is up to you, but it is kinda important.
And that's it, you're ready to go. Protect the area, protect yourself, and get ready for some printing!
 |
| Print on Lokta Fiber Paper |
Select your paper. As with most alternative processes, you want a high-quality printmaking or watercolor paper. I've had great luck with Arches Aquarelle and Rives BFK. Others have recommended Crane Kid Finish, Bienfang or pretty much any cotton rag paper. If it works for cyanotypes, anthotypes, van dykes or other alternative processes, it's probably great for salt prints.
Personally, I prefer smooth surfaces with just a bit of tooth. Too much texture in the paper and it starts removing detail from your print. Too smooth a surface just looks bland to me. I like a nice medium. Hot press papers are generally great for this.
You generally don't need to size your paper, but a simple gelatin sizing may be helpful if you are experiencing significantly less contrast than you expect or desire. To do a gelatin sizing, simply mix up unflavored gelatin (Knox seems the most common brand around here) in hot water and soak the paper in it. Allow to dry completely, then proceed to the next step.
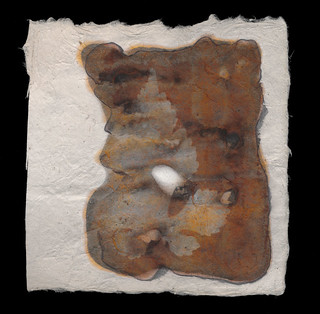
Small note: handmade papers or exotic papers may be too absorbent to use for this process without sizing. I attempted to use some Nepalese lokta fiber paper and it's basically just a rag made of cellulose. I wasn't able to spread the silver nitrate at all and ended up using way too much of the chemical because it had to absolutely saturate the paper. If I experiment again with this paper, I'll be using sizing. I had similar issues with cyanotypes and anthotypes on hand-made paper using dryer lint and shredded recyclables.
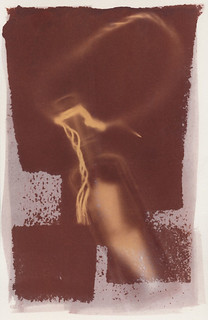 |
| Print made with sea water |
You'll need to make some salt water. The amount of salt in the water is entirely up to your discretion. It's perfectly viable to use seawater. Normally I add about 2 teaspoons of salt to a liter of water. Less than a 2% salt solution doesn't give very much of an image at all. That's basically the minimum required. I have been told that the more salt you add, the more contrast you'll see in the final image. I have not seen a significant difference myself.
You can use chemical grade sodium chloride (additive-free salt) and distilled water. There's no need to use pure chemistry, though. I don't use distilled water. I generally use tap water that I know is absolutely not pure. The pH is on the basic side, it's hard water with a lot of calcium and iron. It works fine. Sea water works fine too and who knows what's wrong with that stuff. Rainwater is fine. The type of water you use, as long as it's not actually contaminated with heavy metals or something, won't produce a big difference in your prints. Minor differences, sure, but not huge ones.
The type of salt you use will dramatically affect your prints. I like using "lite" salt. That's a mixture of 50% sodium chloride and 50% potassium chloride. The important part of the salt is chloride, since you're using it to convert the silver nitrate to silver chloride. Silver chloride is far more reactive to light and produces a much stronger image than silver nitrate. How you get the chloride in your paper isn't important to the light-sensitivity, but it is important to the color. I haven't experimented with ammonium chloride, but I know it can also be used for salt prints.
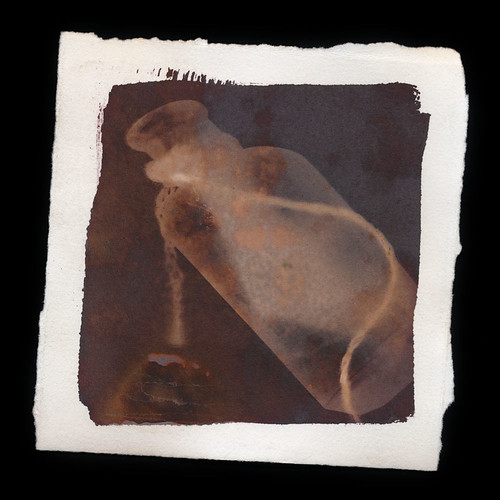
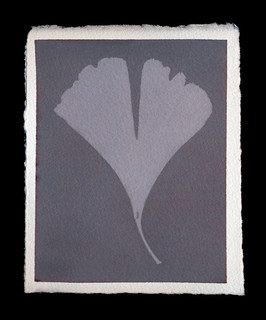
Lite salt produces violet images that, when fixed, turn pale yellow. I have not bothered tracking down any pure potassium chloride to test what it does, but I imagine it has a slightly different effect. My kosher salt images are red to brown before fixing and turn brown or black after being fixed. Prints made with sea water from the Florida coast have produces a nice middle ground
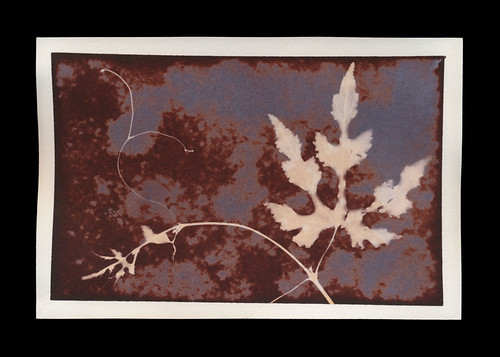 |
| Print made with both lite and kosher salt |
The basic step here is to mix up your salt water and then soak your paper in it. As a faster alternative, you can simply paint the salt water onto the paper with a brush. Either way is fine!
Silver Nitrate
It's time to put on that protective gear! Get your gloves and glasses firmly in place. Once your salted paper is bone dry, paint on your silver nitrate. Do this in low light to avoid fogging the paper or the jar of silver nitrate. I know it's in amber glass, but better safe than sorry. When not in use, the glass of nitrate should be stored in a dry, dark place. I work at night, with a dim lamp or computer monitor as my light source.
Use an eyedropper, pipette or other method to drag a thin line of the 15% silver nitrate liquid across the top of your sheet of paper. Then you can spread it out into an even coating using a foam brush, hake brush, glass puddle pusher or even just a regular flat paint brush.
Getting an even coating can be tricky, because until it exposes, the silver nitrate solution is clear. It can be very difficult to see if you've left any streaks, brushmarks or spots behind. I recommend simply doing two or three light, even coats across the entire surface going in different directions. If you want an especially dark image, you can apply two heavy coats of silver.
Exposure
As with most of my guides, I simply suggest using a picture frame to expose your prints. It's cheap and easy to obtain. Head to your local art supply store, or even the local Target, and grab some inexpensive picture frames that have a hard back. Don't get the really cheap ones with the hinged cardboard back, they're just not sturdy enough to provide good contact between your negative (or object) and the coated paper. I'm going to go into extreme detail on different methods of exposure in a future post.
Since the salt printing process is a "printing out process", it develops while it exposes. You can test exposure simply by looking at a portion of the exposed silver that isn't covered by your negative or objects. When it reaches a density you're happy with (generally dark rusty red or brown), you're done!
Fixing
Now, it is possible to simply treat a salt print like a lumen print and avoid fixing it. However, that isn't traditional and the salt print is a very traditional process. It's also a lot more tactile than the lumen print, so I do generally fix my salt prints. An unfixed salt print, like most unfixed prints, will continue to darken and expose in even standard interior lighting.
To fix a salt print, you can mix your own fixer (difficult and annoying) or use standard photo fixer. Guess which approach I favor? That's right, the standard photo fixer. I use Sprint Rapid Fixer, because that's what I can borrow from the university. It's also what I've used for my entire photographic career. I dilute it heavily, about 20ml of concentrate to a liter of water, meaning it's at 20% of the regular working strength. You do not want stronger fix; it will bleach your prints. Even using the weakened fixer, only fix for 1-2 minutes at most. That's more than enough to fix the image. Again, over-fixing will bleach your prints.
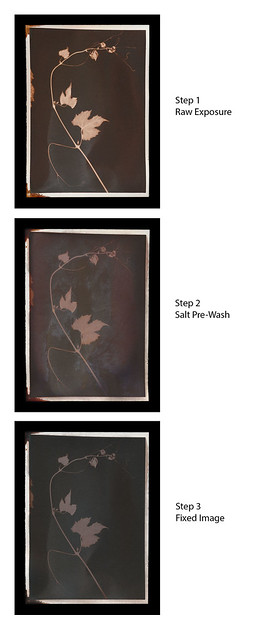
Spiders, you should be aware that fixing a salt print does cause a potentially dramatic color shift. I mentioned earlier that the violet images produced by "lite" salt will fix to a pale yellow. The ruddy reds of kosher or regular salt will fix to a duller, darker red or (with high levels of silver) to an almost black brown. I generally prefer the pre-fix image, but not always. So I scan both before and after fixing.
That's all I've got, Spiders. Between this post and the last one, you should be ready to sally forth and print as long as you've got sun, salt and silver!
