 |
| Shoulder #1 -- My first real success at printing on bone! |
In addition to the bones, I also had a single deer antler to test out. Last semester, one of my students offered me some antlers that she was using in a biology experiment. She'd taken core samples from them to do analysis on, leaving most of the antler perfectly intact. She didn't need the remainder, so she gave me several antlers that I could test on. I coated one of them months ago, but never got around to exposing it until this week. There are more antlers, hiding somewhere... I'll have to track them down eventually.
In-Progress Author's Note: Whew! This post is ending up a lot longer than I expected, and it doesn't even have any pictures added yet! I'm breaking it into sections. Don't worry my Spiders, I just said sections, not different posts.
Cleaning the Bones
This is actually something I'm more worried about in the future than something I had to deal with in these tests. The bones given to me were weeks or months old and had been laying out in the woods. Scavengers and nature had already done the cleaning for me. If you end up having to clean your own bones from something fresher, like a Thanksgiving turkey, then this guide might be helpful. It's written by some awesome little kid that loves collecting skeletons. Rock on, creepy little dude.
Seriously, listen to him when he says stuff stinks. I was foolish enough to try boiling some turkey bones from a Thanksgiving turkey (what, you thought that was a random example?) a few years ago and my entire apartment stank for days. Never again. Next time, I'm stuffing the bones in a bag, tying the bag in a tree and letting nature have at it.
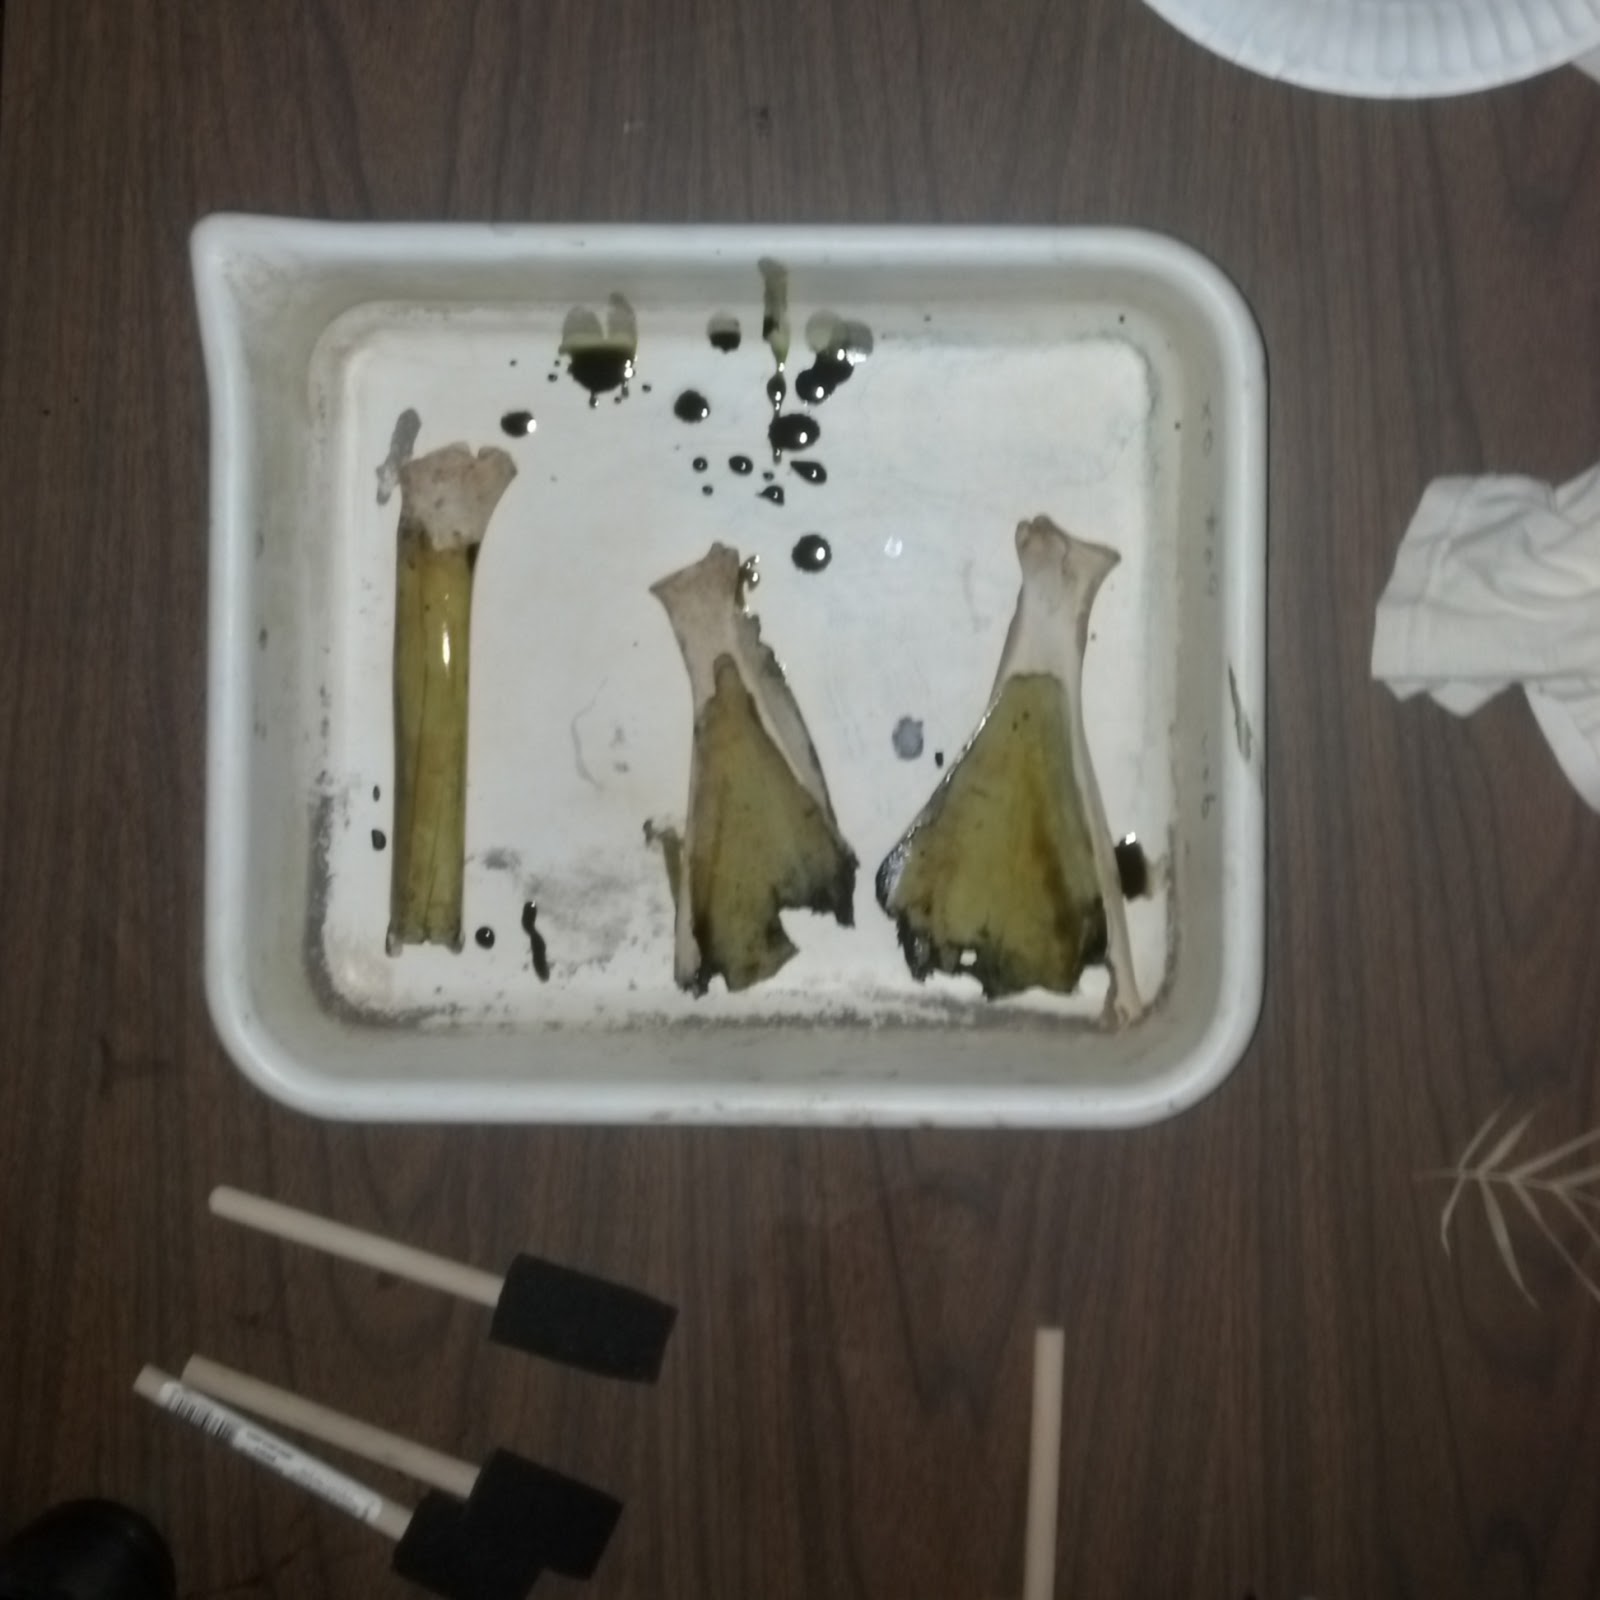
Coating the Bones
 |
| Coating is messy work. |
The antler coated much more easily than the bones, but both surfaces required several coats of chemistry to achieve a decent stain. Even though bone's theoretically porous, the surface is not very absorbent. Coating took a good while, since I allowed each coat to dry partially before applying the next one.
As I said, I coated the antler months ago, so I don't remember precisely how long I waited between coats, or even how many I applied. I do remember it was several, though. It was kept in a dark box, sitting on a metal grate, so it could dry thoroughly. A few days of drying turned into months because I just couldn't figure out what to print on it. I'm still not super happy with the antler, but at least I know the general theory works, if I can find the rest of the antlers from that bag. I've put them somewhere in my lab and just can't figure out where. Don't you hate when you misplace body parts, Spiders?
On the first scapula, pictured at the top of this entry, I applied several coats of chemistry, allowing each one to soak in as much as possible before adding new liquid. The first few coats were allowed to set overnight, then I added some more the next morning before finally exposing the bone to sunlight. I'm not sure if it was just the sheer amount of chemistry applied to that first scapula, or if it was allowing a longer drying period, but the the color on it is much deeper and truer than the later tests.
The other two scapulae and the femur got fewer coats and less drying time. I'm not nearly as pleased with them, so next time, I'll be more patient and more generous with the chemistry. Still, they're perfectly acceptable results, just not as really nice as the first one.
I also tried soaking a knuckle bone in cyanotype chemistry (one good soak for about 2-3 minutes of sloshing and swirling) but that didn't come out at all. The rounded shape did not prove very easy to adhere a plant to, so the image is almost invisible. A majority of the blue color also washed right out of the bone, leaving only a dingy blue-grey. Not real happy with either the color or the image, so I'm probably not going to be doing much more with the rest of the ankle, knuckle and joint bones I have.
Printing the Bones
 |
| Packing tape to the rescue! |
 |
| This just didn't work. |
After taping the bones up, I exposed them for a few hours. About 2 for the first set (the antler and the first scapula), then I went up to 4 hours for the second set (femur, other two scapulae and the knuckle). Again, despite a much longer exposure the second set was never as bright or deep a blue as the first set. Coating was the issue there, not exposure. Both sets were out in direct, bright, hot sunlight.
Washing the Bones
I just dumped the exposed bones into a big tub of water and let them soak for about an hour. Afterwards, I hit them with a bit of hydrogen peroxide. The first scapula reacted fairly well to the hydrogen peroxide, forming the intense blue color seen in the photo, but none of the other bones showed any reaction at all to it. Their blues did become slightly darker and more true after drying was complete, but overall they look much the same as they did once washing was complete.
As a warning for any Spiders that want to do their own cyanotype bones, you are generally not going to get any kind of idea what the final result is going to look like just by looking at the unwashed bones. The washing and a nice long soak is necessary to allow the image to develop, much moreso than for a traditional cyanotype.
 |
| Shoulder #2 -- Second success! |
I honestly didn't have to do much drying or final cleaning. It's been so hot here lately (90s and up) that I just left everything outside in the blazing sun for a few hours. They're ...heheh... bone dry now, and looking great. There's a tiny bit of tendon left on one scapula, but it doesn't smell at all, so I'm not going to mess with it.
There you have it, Spiders. It's entirely possible to print cyanotype images onto bone and horn. It's not even that hard! You can find more photos of the bones and antler prints on my Instagram (I have an Instagram now!) and, soon, on my Flickr.
No comments:
Post a Comment