In a few hours I'll be driving off to East Carolina University, where I did my undergraduate studies. This year's SPE Southeast convention is there and several of my friends are giving presentations. It'll be a great chance to catch up with some contacts, see what folks are doing, and meet up with people I haven't seen in years. Plus, there will be a portfolio throw-down and a print swap, along with workshops and all kinds of fun.
I'm very excited, and I got so busy packing up that I missed my deadline. I'll post the real article sometime this weekend, probably!
Friday, October 10, 2014

Thursday, October 2, 2014
Blogging for Thor: Morbid Midnight Musings
I've been thinking lately, how to combine alternative processes with physical products to create something of artistic interest that is both beautiful and functional? I experimented previously with cyanotype scarves and bags, but that's kind of limited and rather done.
Recently having proven that it's perfectly possible to create lovely images on bone using cyanotype, I just today thought to myself: why not create jewelry out of cyanotype'd bones?
Why not, indeed, spiders. I'll be back next week, hopefully with some progress on this idea! I need a bunch of fairly small, fairly polished bone bits. Off to Etsy!
If any of you lovely spiders have ideas on where to acquire bones at a reasonable price, without getting on some kind of watchlist, please let me know!
Recently having proven that it's perfectly possible to create lovely images on bone using cyanotype, I just today thought to myself: why not create jewelry out of cyanotype'd bones?
Why not, indeed, spiders. I'll be back next week, hopefully with some progress on this idea! I need a bunch of fairly small, fairly polished bone bits. Off to Etsy!
If any of you lovely spiders have ideas on where to acquire bones at a reasonable price, without getting on some kind of watchlist, please let me know!
Friday, September 26, 2014
Blogging for Forseti: A Massive Meh
I'm really sorry, my lovely spiders. I don't know what's been up with me lately. You probably do, since you have access to all my personal information and internet habits. So you know that specifically this past week and weekend, I've been feeling under the weather. But even before that, things just haven't been amazing artistically. Since the big push for my show, I've been fairly drained.
Since the show went up, I haven't made a single new print, or even coated paper. I'm pretty unhappy about it, so I just need to get up and DO something about it. But it's hard, my spiders. It's very hard to work up the energy, enthusiasm and activity to do something creative. I'm running short right now.
I'm going to explore some ideas, spiders. Maybe some of them will kick me in the pants and get me back to work.
Since the show went up, I haven't made a single new print, or even coated paper. I'm pretty unhappy about it, so I just need to get up and DO something about it. But it's hard, my spiders. It's very hard to work up the energy, enthusiasm and activity to do something creative. I'm running short right now.
I'm going to explore some ideas, spiders. Maybe some of them will kick me in the pants and get me back to work.
Monday, September 15, 2014
Blogging for Sol: Bloody Late!
 |
| Unadjusted turmeric dye, which turns red with low pH! |
On Friday, I was a visiting artist at UNCC again! It was great, for all the same reasons it was great last time. Engaged students who were really interested in what I had to teach them, willing to try it out and even experiment on their own!
I demonstrated anthotypes using red cabbage juice, which turns from violet to teal when the pH is lowered by adding baking soda, washing soda or borax. In this case, we used washing soda. That went over really well, and one student in particular tried experimenting with the other dyes I had brought: turmeric and sandalwood. To my surprise, the turmeric experiment showed very interesting results!
When its pH is lowered, turmeric dye changes from goldenrod yellow to bloody, garnet red! It's truly a lovely color. It fades a bit when applied to paper, but it can be applied in a thick, paste-like form and the paper stains pretty darn well! I assume, though I have not yet tested, that it could also be used to soak the paper and create a strong red in that way. I assume all the normal problems with soaking paper would be present in that case, though.
This new potential color source for a bright red is fascinating and I hope to do some experiments in the coming week, despite the rain and clouds. I'll update this post with photos as soon as I'm able to mix up a batch, coat and image!
Edit: DAGNAMBIT!!! I finished this post juuust before midnight, but the time to insert the image rolled it over and now it's logged as being posted on Monday. Bugger. All hail the Moon!
Friday, September 5, 2014
Blogging for Freya: Formulas and Funds
I've been busy this week, preparing for a show in Asheville. I'm displaying my parchment and bone cyanotypes up there, at the Silverspace Gallery. Today, I head off to meet Bridget Conn, the director of the Asheville Darkroom, to do the installation. Working late last night on paperwork and framing is why I missed Thor's deadline. But, in honor of Freya and Freyr, I've got a short post for my Spiders.
Artists make money by selling their work, either directly to customers or by using galleries and shows to gain exposure. In the latter case, the gallery generally charges a commission on sales. That commission is a percentage of the sale price, which means the artist has to pass that charge on to the customer, building it into the final price of their work so that they receive fair pay for their labor, materials and training.
It can be a bit confusing, trying to figure out what to charge for your work. There's a whole blog full of entries about how to price your work, but most of those are issues related to your exposure, your expenses, your effort and other things. Specifically, I'm talking about how to calculate the final sale price of work so that the gallery gets their commission and you get the amount you want back from the work. Here's the formula.
Artists make money by selling their work, either directly to customers or by using galleries and shows to gain exposure. In the latter case, the gallery generally charges a commission on sales. That commission is a percentage of the sale price, which means the artist has to pass that charge on to the customer, building it into the final price of their work so that they receive fair pay for their labor, materials and training.
It can be a bit confusing, trying to figure out what to charge for your work. There's a whole blog full of entries about how to price your work, but most of those are issues related to your exposure, your expenses, your effort and other things. Specifically, I'm talking about how to calculate the final sale price of work so that the gallery gets their commission and you get the amount you want back from the work. Here's the formula.
X = Y / (1-0.Z) where X is the final sale $$, Y is how much $$ the artist wants to make and Z is the commission rate!If commission is 30% and you want to make $100, then the final sale price is $142.86. $142.86 = 100 / (1-0.30). Pretty cool, right? I had some help working out the formula, a friendly computer programmer offered mathematical guidance. Now, I pass that on to you, Spiders. Go forth, and sell!
Thursday, August 28, 2014
Blogging for Thor: Dem Blue Bones
 |
| Shoulder #1 -- My first real success at printing on bone! |
In addition to the bones, I also had a single deer antler to test out. Last semester, one of my students offered me some antlers that she was using in a biology experiment. She'd taken core samples from them to do analysis on, leaving most of the antler perfectly intact. She didn't need the remainder, so she gave me several antlers that I could test on. I coated one of them months ago, but never got around to exposing it until this week. There are more antlers, hiding somewhere... I'll have to track them down eventually.
In-Progress Author's Note: Whew! This post is ending up a lot longer than I expected, and it doesn't even have any pictures added yet! I'm breaking it into sections. Don't worry my Spiders, I just said sections, not different posts.
Cleaning the Bones
This is actually something I'm more worried about in the future than something I had to deal with in these tests. The bones given to me were weeks or months old and had been laying out in the woods. Scavengers and nature had already done the cleaning for me. If you end up having to clean your own bones from something fresher, like a Thanksgiving turkey, then this guide might be helpful. It's written by some awesome little kid that loves collecting skeletons. Rock on, creepy little dude.
Seriously, listen to him when he says stuff stinks. I was foolish enough to try boiling some turkey bones from a Thanksgiving turkey (what, you thought that was a random example?) a few years ago and my entire apartment stank for days. Never again. Next time, I'm stuffing the bones in a bag, tying the bag in a tree and letting nature have at it.
Coating the Bones
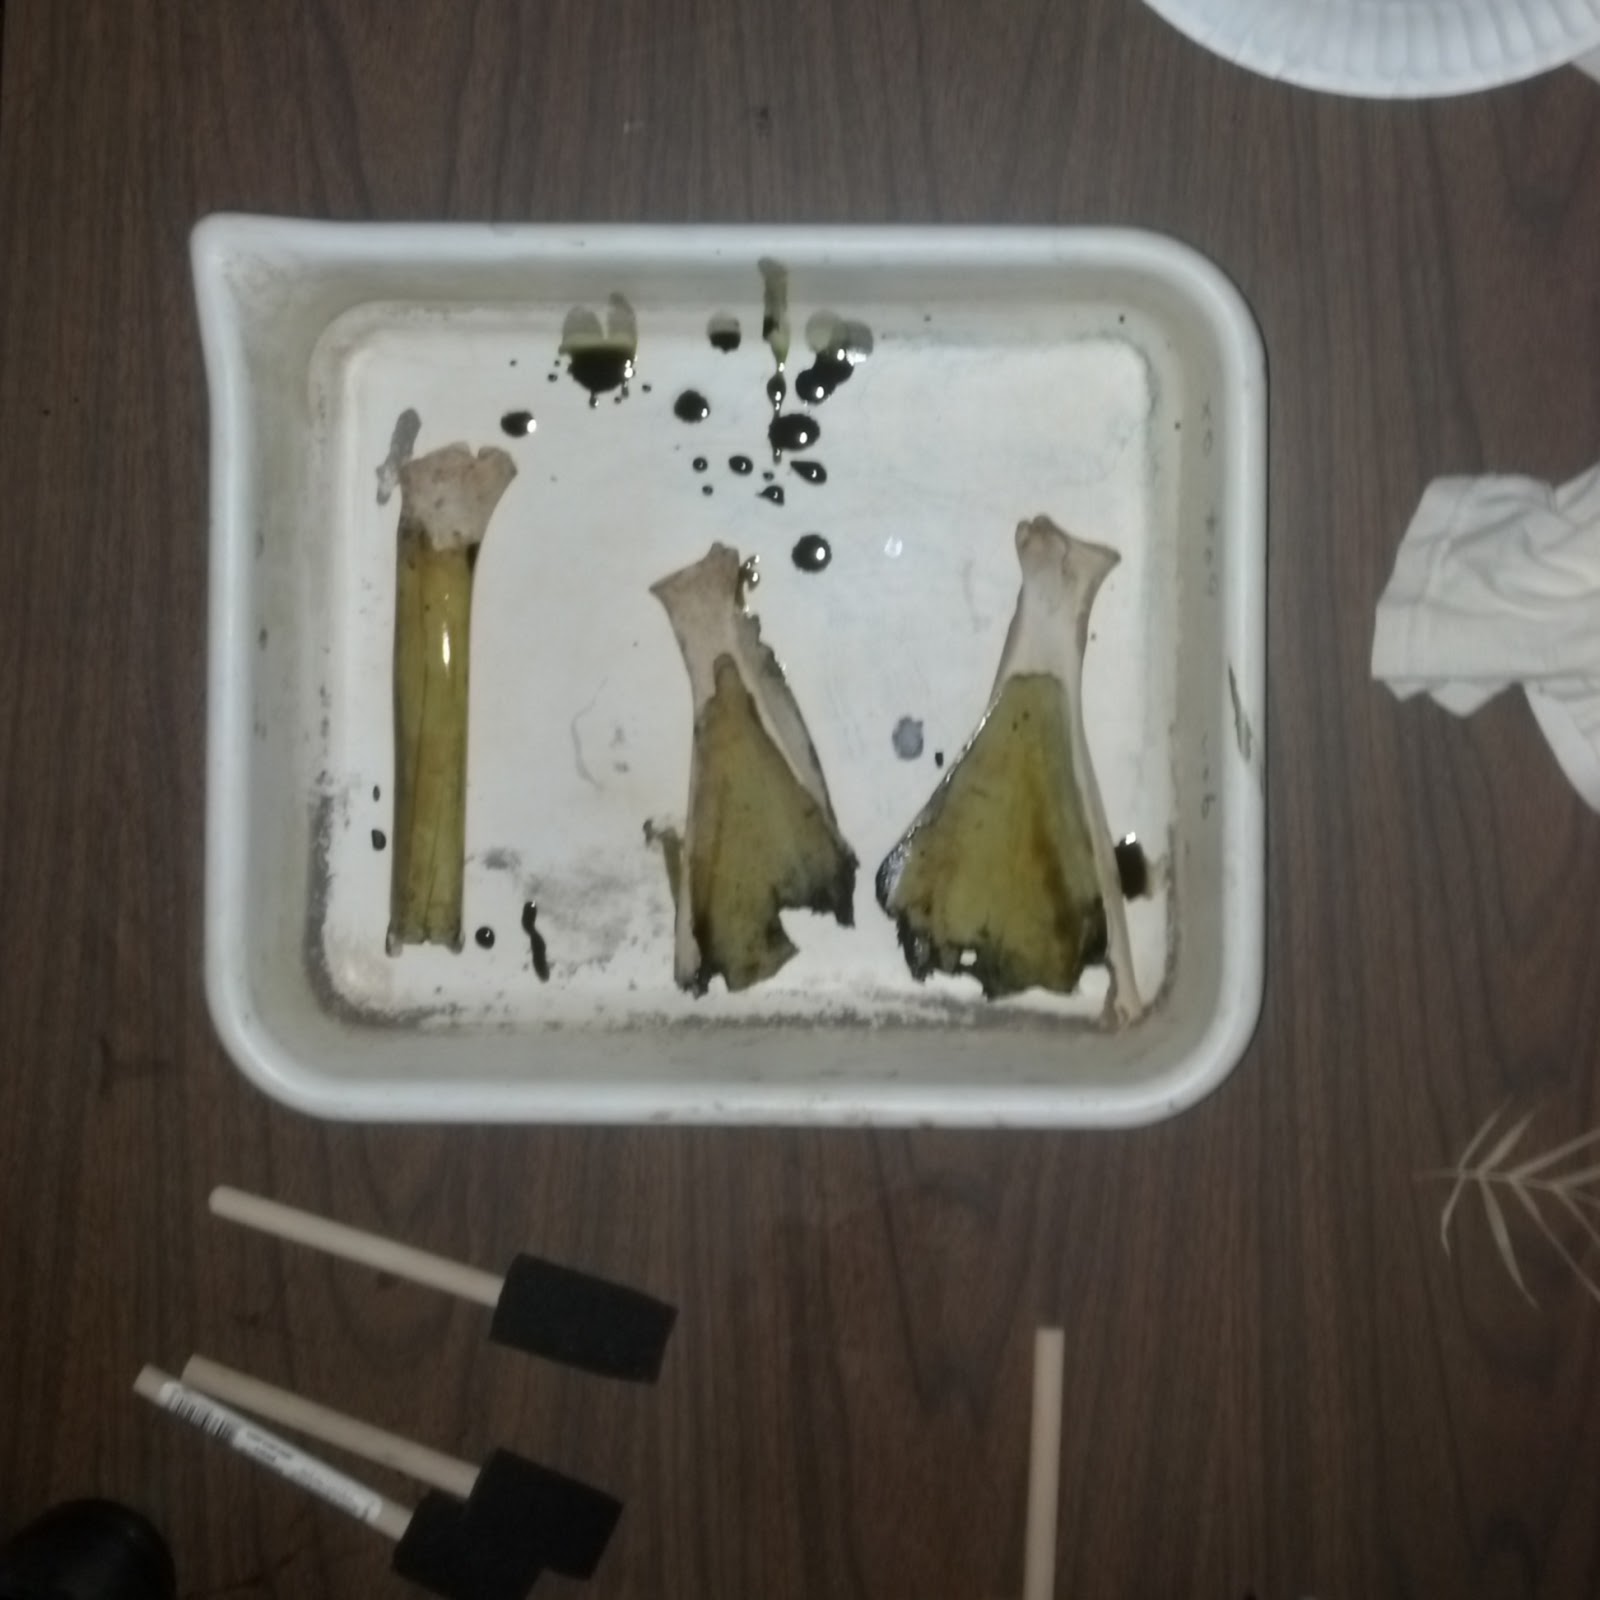 |
| Coating is messy work. |
The antler coated much more easily than the bones, but both surfaces required several coats of chemistry to achieve a decent stain. Even though bone's theoretically porous, the surface is not very absorbent. Coating took a good while, since I allowed each coat to dry partially before applying the next one.
As I said, I coated the antler months ago, so I don't remember precisely how long I waited between coats, or even how many I applied. I do remember it was several, though. It was kept in a dark box, sitting on a metal grate, so it could dry thoroughly. A few days of drying turned into months because I just couldn't figure out what to print on it. I'm still not super happy with the antler, but at least I know the general theory works, if I can find the rest of the antlers from that bag. I've put them somewhere in my lab and just can't figure out where. Don't you hate when you misplace body parts, Spiders?
On the first scapula, pictured at the top of this entry, I applied several coats of chemistry, allowing each one to soak in as much as possible before adding new liquid. The first few coats were allowed to set overnight, then I added some more the next morning before finally exposing the bone to sunlight. I'm not sure if it was just the sheer amount of chemistry applied to that first scapula, or if it was allowing a longer drying period, but the the color on it is much deeper and truer than the later tests.
The other two scapulae and the femur got fewer coats and less drying time. I'm not nearly as pleased with them, so next time, I'll be more patient and more generous with the chemistry. Still, they're perfectly acceptable results, just not as really nice as the first one.
I also tried soaking a knuckle bone in cyanotype chemistry (one good soak for about 2-3 minutes of sloshing and swirling) but that didn't come out at all. The rounded shape did not prove very easy to adhere a plant to, so the image is almost invisible. A majority of the blue color also washed right out of the bone, leaving only a dingy blue-grey. Not real happy with either the color or the image, so I'm probably not going to be doing much more with the rest of the ankle, knuckle and joint bones I have.
Printing the Bones
 |
| Packing tape to the rescue! |
 |
| This just didn't work. |
After taping the bones up, I exposed them for a few hours. About 2 for the first set (the antler and the first scapula), then I went up to 4 hours for the second set (femur, other two scapulae and the knuckle). Again, despite a much longer exposure the second set was never as bright or deep a blue as the first set. Coating was the issue there, not exposure. Both sets were out in direct, bright, hot sunlight.
Washing the Bones
I just dumped the exposed bones into a big tub of water and let them soak for about an hour. Afterwards, I hit them with a bit of hydrogen peroxide. The first scapula reacted fairly well to the hydrogen peroxide, forming the intense blue color seen in the photo, but none of the other bones showed any reaction at all to it. Their blues did become slightly darker and more true after drying was complete, but overall they look much the same as they did once washing was complete.
As a warning for any Spiders that want to do their own cyanotype bones, you are generally not going to get any kind of idea what the final result is going to look like just by looking at the unwashed bones. The washing and a nice long soak is necessary to allow the image to develop, much moreso than for a traditional cyanotype.
 |
| Shoulder #2 -- Second success! |
I honestly didn't have to do much drying or final cleaning. It's been so hot here lately (90s and up) that I just left everything outside in the blazing sun for a few hours. They're ...heheh... bone dry now, and looking great. There's a tiny bit of tendon left on one scapula, but it doesn't smell at all, so I'm not going to mess with it.
There you have it, Spiders. It's entirely possible to print cyanotype images onto bone and horn. It's not even that hard! You can find more photos of the bones and antler prints on my Instagram (I have an Instagram now!) and, soon, on my Flickr.
Thursday, August 21, 2014
Blogging for Thor: Photographic Typos
A friend sent me this article last week and it's pretty cool all by itself. I'm relinking it here because it isn't just relevant to typos. This quote really sums things up:
Writing may not be easier than photography, but it does tend to have a bit more time. Even if there isn't an editor specifically checking your work, you may have time to allow your brain a few hours to dump all its expectations and review your work fresh. Remember in high school, being told to wait a full day between writing a draft and editing it? I hated the idea, but it often worked so well.
Generally, as photographers, we don't have that time. We're expected to finish an entire shoot in a few hours, and may not have a chance to re-do the shoot to correct mistakes. So it's vital that we teach ourselves (and our students) to look at what is actually in the picture. Try as much as possible to force yourself to see reality instead of expectations. It's not easy, because your brain is fighting you the whole time. That isn't how it's wired. It's a difficult skill to master, and no one can do it right every single time. But even trying to do it is a great achievement. It puts you leagues beyond most camera users. Visual awareness is probably the single thing that defines a good photographer. It's knowing exactly what will be in your photo. If you can't get it down before you shoot, you're still doing well to be able to review your photos and notice the unintended contents or mistakes on the second pass.
If you can tether, or load your photos onto another device for review during a shoot, do it!! Just as the article mentions that you can improve your proofing results by printing out or otherwise re-formatting your text, you can get the same improvement by viewing your photos in another manner. Even aside from that, it's just hard to do a good job reviewing photos on the back of a camera.
Well, spiders, that's all for this week. I'm probably going to miss next week, but I'll try to write an article early and get it up via auto-post. I might have the same problem week after that, too. Next weekend is Dragon*Con and the week after, I have a solo show up in Asheville that I've got to prep for. It's a busy month, spiders. I'm stressed and excited about everything.

We don’t catch every detail, we’re not like computers or NSA databases,” said Stafford. “Rather, we take in sensory information and combine it with what we expect, and we extract meaning.”That isn't just true with typing. It's true with all perception, especially visual. That means it's true for photography. As photographers, we see in our cameras what we expect to see in our minds. It's easy, especially when you're first starting out, to mentally blank out everything but your intended subject. Not notice the light socket in the background, or the lamp growing out of your subject's head. Not notice that you're out of focus, not notice this shadow or that power cord. It's so, so very easy.
Writing may not be easier than photography, but it does tend to have a bit more time. Even if there isn't an editor specifically checking your work, you may have time to allow your brain a few hours to dump all its expectations and review your work fresh. Remember in high school, being told to wait a full day between writing a draft and editing it? I hated the idea, but it often worked so well.
Generally, as photographers, we don't have that time. We're expected to finish an entire shoot in a few hours, and may not have a chance to re-do the shoot to correct mistakes. So it's vital that we teach ourselves (and our students) to look at what is actually in the picture. Try as much as possible to force yourself to see reality instead of expectations. It's not easy, because your brain is fighting you the whole time. That isn't how it's wired. It's a difficult skill to master, and no one can do it right every single time. But even trying to do it is a great achievement. It puts you leagues beyond most camera users. Visual awareness is probably the single thing that defines a good photographer. It's knowing exactly what will be in your photo. If you can't get it down before you shoot, you're still doing well to be able to review your photos and notice the unintended contents or mistakes on the second pass.
If you can tether, or load your photos onto another device for review during a shoot, do it!! Just as the article mentions that you can improve your proofing results by printing out or otherwise re-formatting your text, you can get the same improvement by viewing your photos in another manner. Even aside from that, it's just hard to do a good job reviewing photos on the back of a camera.
Well, spiders, that's all for this week. I'm probably going to miss next week, but I'll try to write an article early and get it up via auto-post. I might have the same problem week after that, too. Next weekend is Dragon*Con and the week after, I have a solo show up in Asheville that I've got to prep for. It's a busy month, spiders. I'm stressed and excited about everything.
Subscribe to:
Posts (Atom)