Thursday, July 17, 2014

Blogging for Thor: Teaching Spiders about Salt

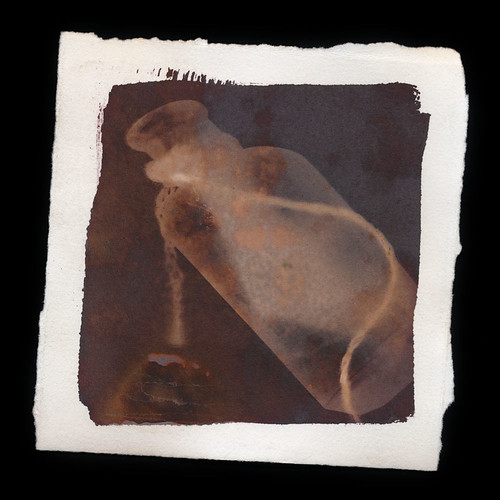
Salt print made during a demo with
tap water and fast-food salt packets.
It doesn't get any less exacting than this.
Well, Spiders, I've been talking about salt prints for a while now. I've finally set aside some time to document the process and write a short guide to making them in your kitchen. Maybe not literally in your kitchen, because everything I've tried to remove the silver stains from my counter has failed. I've got a nice splatter of brown dots there and they show no signs of going anywhere. If you take care to avoid and spills, drips or splatters, you should be fine. Then again, you're spiders and you don't have kitchens. Just work anywhere, really.

Salt prints aren't complicated. They're also not very dangerous. You can purchase the silver nitrate required in a pre-mixed low-concentration solution. I bought my 15% silver nitrate from Bostick & Sullivan. Here's the link to the specific product I used. 100ml should last a fairly long time, since you only need a single eyedropper full to coat a 5x7 sheet of paper. Each eyedropper is maybe 1ml.

By avoiding powdered silver nitrate, you significant reduce the risks of the chemical. In its dilute, liquid form, it won't burn your skin or get into your respiratory system. It can still cause some nasty harm if it gets in your eyes, but wearing glasses or goggles will protect you. At worst, it will cause stains on counters, skin and anything else organic (including plastics... like plexiglass and acrylic). So what safety gear do you need? Gloves and glasses. The most basic of chemical safety practices will be entirely sufficient.

I am assuming that you use 15% liquid silver nitrate solution. I won't give any details about how to mix the solution yourself, because I never do that. I don't like caustic chemical dust in my house.

Now, onto the actual process! Here's the short, simple version first.

Basic Materials


  • Salt (approx. 10-100 grams)
  • Water (approx. 1 liter)
  • Brushes (foam, hake or flats) or a Puddle Pusher
  • Soaking basin or tray
  • Jug or glass to mix salt water in
  • 15% silver nitrate solution
  • Eyedropper
  • Rubber gloves
  • Protective eye goggles or glasses
  • High-quality watercolor or printmaking/drawing paper
  • Picture frame or alternate exposure method
  • Negatives or photogram objects
  • OPTIONAL: Hair dryer
  • OPTIONAL: Photographic Paper Fixer (diluted to 25% regular working strength)

Simplified Step-by-Step Instructions


  1. Gather your materials and set up!
  2. Mix up a 1-5% solution of salt water.
  3. Soak your paper in the salt water for at least 10 minutes.
  4. Dry completely!
  5. Use the eyedropper to apply a line of silver nitrate across the top of the salted paper.
  6. Spread the silver nitrate into a thin, even coat with a foam brush.
  7. Dry Completely!
  8. Place a negative or photogram object on the coated paper.
  9. Cover the paper and your negative/object with glass. Real glass, not plexiglass.
  10. Place in the sun for ~10-20 minutes.
  11. VERY OPTIONAL: Rinse the print in a salt water bath for 5 minutes to remove extra silver. 
  12. OPTIONAL: Fix the print in regular photo fixer (diluted to 25% strength) for 1 minute.
That's it. That's the entire process! Well... basically. I can, and will, go into a bit more detail. Actually, a lot more detail, my arachnodroid friends. The rest of the write-up is already over 1000 words long and it's still not done. So that's going to be broken off into a second entry. Stay tuned, spiders!

Friday, July 11, 2014

Blogging for Freya: Flickr Failure

Whelp. Looks like I'm being punished for all these late blogs. I'm locked out of my Flickr account, spiders. Whatever password I set up is not one of the standard bases that I use. I've gone through everything I can think of and nothing. I've tried resetting the password, but Yahoo! doesn't just send an email to your registered account. If you can't answer the "Secret Questions" that you created (years ago), then you're screwed. Forever.

And I can't answer the Secret Questions. I know what city my non-existent honeymoon was in, but what my 'favorite book' was way back then? I have no idea. No idea if I actually listed a 'favorite book' or came up with some smart-ass answer that there was no way I'd ever forget. I've forgotten.

So while my Flickr still exists, I cannot upload further images or check any comments or messaged sent to me via Flickr. I'm continuing to wrack my brain, hoping vainly that the password will pop into my head, but so far no go.


This sucks, spiders. It really sucks.

Wednesday, July 9, 2014

Blogging for Odin: Microwaves are Bad for Skin

Ok, spiders, I don't have a good excuse this time. Or even a bad excuse. I just kept doing other things instead of blogging. I'm sorry. I realize that whenever I say "I'll make it up by blogging twice!" that I almost never do. So I'm just gunna take it and say that, well, I missed last week. You do get two blogs this week, but that isn't a make-up.

I was hanging out with Laurie Schorr (the awesome lady who introduced me to the Light Factory) at her studio this weekend, working on salt prints. Those were a ton of fun, especially because we had just what materials were on hand. There was no measuring, no strict standards, no control. Just a bunch of salt packets from delivery food stashed in the drawer under the microwave, tap water and some plastic cups. We were mostly printing on scraps, everything was hurried along because it was just a few hours of time... and we got some great prints!

But that isn't what I'm talking about today, because I still want to do an amazing post on salt prints and I haven't got it together. I know, I'm terrible at everything. Thanks for the ego-boost, spiders.


cyanotype shrinky-dink
Today is about why it's a bad idea to microwave parchment. For some processes, you can speed up drying times by using irons, ovens and microwaves. Nothing bad happens, it's all great. Anthotypes work fine with these, and silver gelatin paper works fine with irons and regular ovens. I don't recommend microwaving silver gelatin paper, though. Normally, you can iron or bake cyanotypes, too. I've even microwaved wet cyanotypes on paper or cloth and had no bad results, but after some consideration, I really don't recommend that either.

Once upon a time, I tried to speed up the drying process for one of my cyanovellums by microwaving the print. The parchment, which is just animal skin, heated up rapidly and contracted into a tiny chip. Originally it was about the size of my palm, but it ended up no bigger than my thumb. The image remains intact, but it's very small, brittle and dense now. Kinda like a shrinky-dink, really.

I kept the shrinky-skin and glued it to a trash print just to provide backing and some surrounding color. It's framed and everything. There's a lesson in there about patience and letting things happen on their own time, but the important lesson is just to not microwave animal skin. It shrinks. A lot.

Monday, June 30, 2014

Blogging for the Moon: Lunar Caustic

Unfixed Salt Print on Fotokemika Varycon
I'm sorry spiders, I've just been feeling down for a while. A few things happened that kept the sad rolling and I just wasn't able to muster the mental fortitude to resist. So I spent a while trapped in the fog, with no work to break me out. I did manage to do some experiments while I was in there, but I just couldn't get to the record keeping and documentation steps, or actually bring myself to write them up. I've let you down, spiders, and I've let down Thor, Freya, Baron Samedi and the Sun itself. Darn.

Well, as I've been forced to hear repeatedly in recent days, all you can do once you've made a mistake is learn from it and move on, trying your best not to repeat the mistake. I know that I'll be late to blog again, but I'm really trying to get better. I might even try to write my blogs early and schedule them to automatically post on Thursdays. That'd be pretty novel!


Let's skip that stuff and get to what you actually care about, right? Spiders care nothing for human trials, but love some photography. Or something. Today's topic is one of my recent experiments: salted lumen prints. I was lead to this idea by John Fobes, who coated one of his lumen prints in albumen mixed with ammonium chloride. Mr. Fobes got some very interesting color shifts as a result of printing on the still-wet albumen-coated paper, but it got me wondering if it would be possible to use silver gelatin paper as a base for salt prints to combine the salt print with a lumen print.

I soaked two sheets of Fotokemika Varycon fiber-base paper in a simple solution of filtered tap water and kosher salt, the same kind of solution I'd use to soak normal paper before making a salt print. I used quite a lot of salt, getting the water up to the saturation point. Then, I allowed both sheets to dry completely overnight before coating one sheet in the same 15% silver nitrate solution used for salt prints. I allowed that sheet to dry for several hours as well, then exposed them both as I would normal lumens, for 1 hour each.

Overall, I did not see a big difference between a salt-soaked lumen print and a regular lumen print, at least not on the Fotokemika Varycon paper. They look about the same, the only significant difference being that the salted print had less color and was overall less vibrant. I'll be testing other brands of paper to see if I can achieve different results. I think Mr. Fobes' use of albumen also contributed to the color shifts he saw, not just the application of chloride.

Using the silver gelatin paper as a base for a salt print proved effective. The paper doesn't take coating as evenly as something more porous would, but I think that can be solved with multiple coats of silver nitrate, or just more careful application. The image looks very similar to a traditional salt print, but carries strong undertones of the paper color. The unfixed image carries much more of these tones, but that's because fixing destroys most of the color in Varycon paper. I plan to experiment with a more vibrantly colored paper, maybe Collodio POP or Harman Direct Positive, but the concept proved itself. You can make a salt print on silver gelatin paper, and doing so does affect the final image.

Friday, June 20, 2014

Blogging for Freya: Horrible Plagues

Ugh. Every time I deal with kids, I get some new disease. I was on my way to blog last night when I was struck down with some kind of bone-aching stomach fever. It's better now, but it was pretty nasty. On the bright side, my summer camps seem to be going well this year, and I even have a workshop for adults to throw in there on the side. So things are looking fairly decent as far as my activity and productivity levels go!

I had been planning to write a very short and simple guide to salt printing at home, but the plague wiped me out. I'll try to write it this weekend. Sorry, spiders!

Friday, June 13, 2014

Blogging for Freya: Stumped

I know it seems weird, considering how often I miss my Thursday deadline and end up posting on Friday, but I do have a backlog of ideas for posts. Right now it's 5 of them, and I've really been wanting to dive into one, but it turns out to get more complex each time I start on it. It has to do with categorization in photography. What's the difference between a chlorophyl print and an anthotype? Is this a chemigram or a lumen print? Are my un-developed cyanotypes lumen prints? If I dunk a lumen print in developer, is it still a lumen print?

This may be developing into a serious taxonomically induced existential crisis. I don't know how to categorize a lot of the work I'm doing now. It bugs me sometimes, mostly when I get told that I'm labeling my processes wrong. If I make a "lumen print" with liquids instead of solids, now it's a "chemigram" for some reason. The whys and whens of what to call different photographic techniques are messy.

Sometimes, I'd really like art to borrow a bit more from science and actually define things. Scientists know what they mean when they say something is organic or inorganic, metallic or non-metallic, a semiconductor or a superconductor. I want some taxonomic certainty!

Friday, June 6, 2014

Blogging for Freya: Basic Chemistry

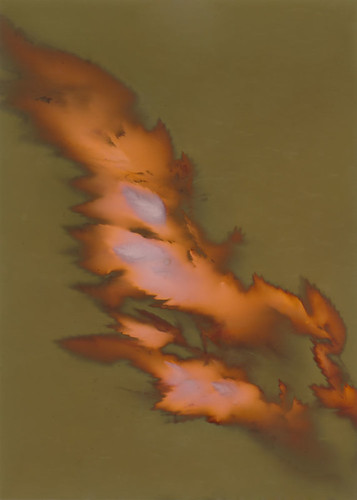
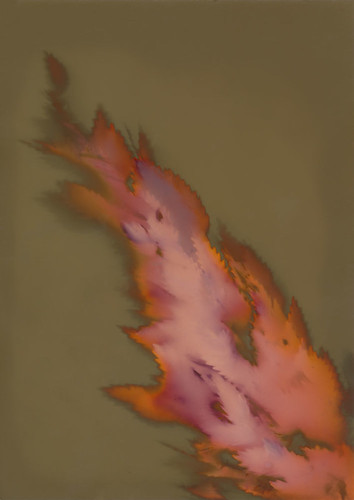
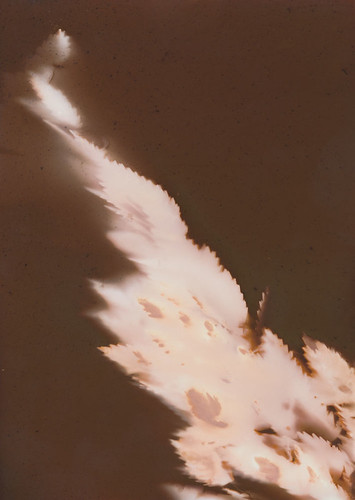
4 hours, regular water
2 hours, basic water
2 hours, acidic water
Ugh, sorry Thor! I'll make it up by posting twice this week. I just lost track of blogging today.


I have previously experimented with exposing lumens in water. Often a paper has totally different characteristics when exposed to moisture, so lumens made in water will tend to display a radically different color scheme than normal. Since both the paper and the printing object are floating in water, contact is limited and the images are blurry, sometimes very blurry if the paper or object are disturbed in the water. Debris can get into the water, moving around and creating interesting background results. The water adds another dimension to the printing process.

Over the last few days, I decided to try something else. I already knew from
other experiments (and just basic darkroom chemistry) that photographic paper reacts not only to moisture, but also to acids and bases. Developer, for example, is basic. Stop bath is acidic. I once tried painting liquid detergent (a strong base) onto photopaper, only have to it turn black within seconds. I knew ahead of time that by adding acids or bases to the paper, I could influence how it developed. So, I mixed up some solutions and exposed lumen prints in either a slightly acidic solution, or a slightly basic solution.

My base solution was just a simple addition of baking soda to hot water. I dissolved the soda completely, though I do plan to do some later tests with larger amounts to see what it does when large amounts are in direct contact with the paper. From these preliminary tests, I found that (as expected) the baking soda solution seems to accelerate the exposure. Normally the paper tested, Fomalux RC Contact Paper, shifts from violet to green over the course of 4-5 hours if exposed underwater. When immersed in the baking soda solution, that time was cut in half. I got a full conversion to the desired orange-green scheme in just under 2 hours. Normally a 2 hour exposure in water is just brown. I'm going to experiment with this to speed up other long-exposure papers like Collodio POP and Harman Direct Positive.

For the acid solution, I used anhydrous citric acid crystals, which I did not fully dissolve. In one test, I sprinkled the crystals directly onto the paper. No significant results, but the areas of contact did show some minor resistance to exposure. In general, the acidic environment did as expected and slowed exposure considerably. The Fomalux paper, after 2 hours, was a dull brown with very little contrast. It seems to affect the background more strongly than the object (possibly not as much acid reaching the paper where it was covered by the object?) because the object was turning orange already while the rest of the paper was still brown.

I'll be trying with some other solutions and concentrations, but I think this technique (especially the basic solution) has some interesting potential. Speeding or slowing chemical exposure of lumens could allow for some fun play with papers that normally expose too fast or too slow. I need to see if I can produce the results without submerging the prints, possibly by pre-soaking the paper. That would allow more traditional, full-contact lumens. That'd be nice; I like detail.