Showing posts with label chemistry. Show all posts

Thursday, July 7, 2016

Blogging for Thor: Geometric Progress

Hi Spiders. I'm sorry I haven't been posting lately, I've been working on other things. Like photography with an actual camera. I've also just been feeling a bit down lately. I do have a post tonight, even if it's a bit short.

Overall, the Silver Geometry Project is going well. I've pretty much got color control down, though I do want to experiment and find more colors to introduce. I'd love a more reliable green and a true black. Palladium might work for the black, but daaaang is it expensive. So I'm hoping to find an alternative. I can get pretty close to black by using a potassium salt and silver nitrate, but I'd like another option. My only green choices so far are under-exposed cyanotype (very fugitive) and solarized silver nitrate with a sodium salt (takes way too long, and is very dull).

The biggest challenge is creating the original pencil designs, the "geometry" that underlays the chemigram and photogram. If the geometry isn't interesting, even the coolest chemical reaction generally won't save it. So I'm studying a lot of geometric art. Deco, constructivism, and futurism mainly. Abstract expressionism... maybe. There are some interesting painters from the 60s and 70s that I'll probably take a look at.

I feel like the project is on a good path. I just need to push it further, and really have the designs and the chemistry come together perfectly. I've had a few successes so far!

Oh, and I'm really enjoying the small scale. I started with five inch squares, and then tried some three inch squares. Surprisingly, the three inch squares seem a lot easier to work with and create complex designs for. They're certainly easier to paint, but the mixing of chemicals overwhelms them more easily. There's just not much space for a chemical spill that doesn't become the focal point of the entire image.

Friday, June 17, 2016

Blogging for Freya: The Importance of Lite

Silver Geometry #1, kosher salt
Silver Geometry #1 (reprint), 'lite' salt.
Hello, Spiders! It's been a while, and I'm sorry. I've been having a rough spot. Hopefully things are looking better! I'm certainly being more productive!

Lately, I've been back at work on the Silver Geometry Project, because there's a few shows I want to submit pieces of it to. I think they work better as 'stand alone' pieces than my thesis work does. The thesis work needs the artist statement, the titles, and some context to really be understood fully. I think that's a weakness of the thesis, and I'm working on it as I research ideas for new pieces. Silver Geometry, though, has really strong images even if the conceptual framework is looser and less rigorous. So they're what I'm working on right now, and trying to push to shows.

While I have been making new designs, I also started to re-visit some of the designs where I like the drawing, but feel that the prints didn't work out. It's been interesting, since there are a lot of little elements that are outside of my control in the process. I've also been experimenting with altering how fast I work.

Silver Geometry #13, with most of the value variation lost
This week, I tried to create more variety of value by moving the photogram material around pretty rapidly. It worked out well, but the resulting values were so delicate (created after only minutes of sunlight) that all it took was a little hesitation and distraction for a blast of bright, direct light to nearly obliterate the delicate shading. So, while I like the idea of more controlled value variation, I probably need to do that on one print at a time, instead of shuffling my attention between several prints at once. I may also need to do that on overcast days, or even inside through a window. Direct sunlight just moves the reactions too fast.

In these recent prints, I've also been manipulating the chemistry more directly. I created some lighter blue colors by diluting the cyanotype chemistry with water. I forced the silver nitrate to turn violet and red instead of brown and black by using "lite" salt instead of regular salt when preparing the paper. Since "lite" salt is a mixture of 50% potassium chloride and 50% sodium chloride, it causes a dramatically different coloration.

Up next is really small prints made from scraps of the larger sheets of Rives BFK that I'm using for the 5x5s. These are about 2.5 inches square, so the designs have to be a lot simpler. I think that'll be a fun challenge. I'm also considering some 5x5s where the chemigram component is extremely simple, and all the visual interest comes from the value added in the photogram stage. It's been a super busy week, but I'm hoping to get a good bit done this weekend and next week!

Check back in soon, Spiders!!

Friday, April 29, 2016

Blogging for Freya: Fun with Food

Transference #2 – Orange juice, rice, milk, flour
Ugh, I'm getting so bad at this, Spiders! I'm supposed to blog for Thor! But I forgot entirely last week, and this week I was at game night. Sorry, Thor. At least Freya alliterates well with this week's topic! And, as a fertility goddess, she's more suited to a post about food!

My thesis project is going well. I've hammered out an artist statement that's concise and meaningful, I've produced a good start on a body of work, I've got lots of new places to go with that body of work, and I'm enjoying my work!

In short, I'm making 'chemigrams' with food, or the ingredients of food. Playing around with different bits of food science, baking, and cooking to produce chemical reactions that cause photo-paper to change color under sunlight. So, they're 'lumen prints' in that they're made on darkroom photo-paper exposed to sunlight, but they're chemigrams in that the only thing used to make them are chemically active, not negatives or inert objects. The paper does really react to the chemistry. Acids, bases, oils and salts all have distinct effects on the paper, aside from simply altering how much light reaches the surface.

The biggest problem has been that I have classes and work during the day, so I tend to leave home soon after getting up, and get home shortly before the sun goes down. That's made it extremely difficult to get much printing done. But the weather is finally turning sunny, and classes are almost over. I hope to get a TON of work done this spring and summer! I'm finally really excited about my projects, too. That's so important, because now I'm actually motivated to do work.

The failed baking soda / vinegar volcano print
My latest experiment was building a baking soda and vinegar volcano on a sheet of photo paper... it didn't come out super well. The baking soda worked fine, even created some nice patterns, but the vinegar turned the paper an unpleasant poo-like brown. I have some ideas on minimizing that, so I'll try the experiment again. Probably later today!

The next idea I have to work on is creating a webwork made out of the stringy bits on bananas (I'll have so many bananas left that I'll probably make banana bread) and the smaller stringy bits found on orange slices. The challenge will be to use the right paper. Since the banana strings and orange strings are so thin and small, it needs to be a paper that reacts to light quickly. Otherwise, I'm afraid that the light will burn through these small objects and leave a very low-contrast, poorly-defined image.

I may also give a shot at printing an image that's immersed in boiling water. I've done underwater prints before, so I know they work. Making the water boiling could be fun! I'll probably do that with something that I suspect will react strongly with boiling water. Maybe milk or yogurt, which may begin to curdle and burn? Or cheese, which may melt? It'll be fun! I could even freeze the paper ahead of time, and then pour boiling water on it while it's still frozen. I know if you do that with film it can shatter the gelatin base, causing a crackle effect. I don't know if that would be visible on photo paper, but it's worth a shot!

Thursday, February 4, 2016

Blogging for Thor: Chemical Crossovers

Potassium Dichromate (K2Cr2O7): a rather nasty
but potentially beautiful little chemical
I really enjoy the ability of social media to bring together artists from all across the world. After posting yesterday's blog on the Alternative Photographic Processes Facebook group, I got some wonderful responses from Serdar Bilici, Johannes Schmidt and Mark Osterman. So, instead of sharing some of my own work today, I'm going to be discussing ideas from these fine folks.

Serdar informed me that he had previously made images using silver citrate, silver tartarate and silver carbonate instead of a silver halide. Unfortunately, he did not have any scans of these images, but he did say that he found them either too low in d-max, or too high in contrast for negative printing. Here's a list of what he said he used to create the different silver compounds

Silver Citrate = Silver Nitrate + Sodium Citrate
Silver Tartarate = Silver Nitrate + Tartaric Acid (maybe from cream of tartar?)
Silver Carbonate = Silver Nitrate + Sodium Carbonate (soda ash)

Basically, all that means that silver compounds aside from halides can likely be used to print visible images. I'm going to give these a try most definitely, especially since soda ash and cream of tartar are so easy to get. Sodium citrate is available from the university lab, so I'll be giving that a shot as well.

Mark Osterman discussed with me the fixing ability of potassium iodide. Previously, I had fixed several prints in 5.6% potassium iodide, but not noticed any significant difference in the result from the more traditional sodium thiosulfate fixer. If anything, the potassium iodide leaves a warmer tone in the fixed image, but both fixing processes remove a lot of the color from a salt printed image. Mark says that, in theory, a salt print fixed in potassium iodide should turn yellow as the silver is converted to silver iodide. He also recommended that I find a copy of Records of the Dawn of Photography, which is a published version of Talbot's early notebooks. Unfortunately, that book sells for over four hundred dollars and there aren't any circulating copies in my local libraries. I may be able to visit a nearby university (I'm in friggin Boston) and make scans or notes. I'll have to look into that.

The most interesting conversation, though, was with Johannes Schmidt. He told me that he'd run across some literature a bit over a year ago that suggested adding salts of organic acids to the standard sodium chloride and silver nitrate mixture used in salt printing could alter the color of the print. He mixed up solutions of potassium or sodium compounds of acetate, ascorbate, formate, succinate and tartrate. These solutions were applied along with sodium chloride to paper, which was then sensitized with silver nitrate. He also tested the effects of dichromate, iodine and photographic developer on the silvered paper. There are some truly lovely results, especially from the dichromate. In fact, I'm going to borrow some ammonium dichromate from the university and do some tests of my own with applying it to salt prints.

Who knows, maybe I'll give up on this whole "photogram" thing and just create my images through pure chemistry. Chemigrams are popular, right?

Wednesday, February 3, 2016

Blogging for Odin: Orderly Presentation


Well, Spiders, I'm a bit late with today's blog. Six days late, actually. Unfortunately the only excuse I have is that I simply didn't get around to editing all these images and patching them together into a cohesive scan. The beginning of the semester has been a little stressful, and I've been trying to keep it all together. But, I do hope to have an entry for tomorrow, too!

After my experiments with photograms, I decided I needed something more controlled to really do a proper test of these different halide solutions. So, I created a little digital "test sheet"that has a smooth white-to-black gradient, a 15% medium grey bar, and a six-step zone chart that has 100%, 80%, 60%, 40%, 20% and 0% black. Using this test sheet, I can tell if one compound has more contrast, less contrast, exposes faster or slower, and get a much wider range of tonality than by using photograms. I'm also controlling the process further by printing in one of the university's UV exposure boxes, instead of in sunlight.

So far, my results aren't mind-blowing or anything.

The potassium iodide (KI) is really.. ugly. I mean, there's just not anything redeeming about it, especially not once it's been fixed. Maybe it's nice in the "latent" form, just after exposure, but even just a salt water wash makes it muddy and unpleasant. Fixing it just turns it to a dull, rather hideous brown.

Ammonium chloride (NH4Cl) is extremely similar to sodium chloride (NaCl). The only difference I can see, and it's quite subtle, is that the ammonium chloride seems to be a little bit warmer. There are two tests for ammonium chloride because the first test had some pretty hideous staining. The second test, though, was slightly compromised because I waited a full day between exposing it and fixing it. This almost certainly caused some fogging in the paper before the fixing.

Bromo-Iodizer has the most interesting results, providing warm yellow highlights and soft brown shadows. I can certainly see some uses for this coloration, but I'm personally not a huge fan. I do like the long-exposure greens that it produces, but I'm not sure if I like it enough to continue working with the Bromo-Iodizer. It's quite nasty stuff, and I may be able to get similar results by simply using potassium bromide and potassium iodide together, without the presence of alcohol or cadmium.

Assuming that I've recovered from my current head-cold by tomorrow, I'll be giving a test to potassium chloride and potassium bromide, both of which arrived recently. I was able to mix up a 3% solution of both, coat and dry some test sheets, but didn't have time to apply the silver nitrate or do a test exposure. So those salted papers are waiting for me in the lab!

Toss some positive vibes my way, Spiders. I could use 'em for this little plague.

Thursday, January 21, 2016

Blogging for Thor: Saline-ent Findings

Sorry for the terrible pun, Spiders, but I'm running out of witty references to salt. This week, it was hard to wait to blog! I was so very excited about the results of my latest experiments. I think this weekend I'll be at the university, making some test prints. I have a hairdryer now! And I'm awaiting the delivery of more chemistry for further testing, too.

Here's what has me all worked up: I successfully printed photograms with non-chloride silver salts. I tested out potassium iodide and Old Workhorse Bromo-Iodizer as catalysts for salt printing, along with a sodium chloride control print and an ammonium chloride side-test. Everything produced a clear, visible image. I'm going to discuss first the basic parameters of the experiment, the controls, and then get into the preparation and results for each halide solution.

Test sheets prior to exposure.
All but one show significant fogging.
Controls: Each of the four prints was made on a sheet of Arches Platine paper, all the same size, all taken from the same full sheet of paper, and all coated at the same time. All four test sheets were first painted with a solution of the chosen halide, then allowed to dry and stored in butcher paper for 3 days while I waited for good printing weather. The night before printing, each paper was given a single coat of 12% silver nitrate, allowed to dry overnight in a dark box. Despite being in a dark box, the drying time was too long. Each test sheet showed discoloration when the box was opened. I will repeat these tests with fresh-dried sheets soon.

Bromo-Iodizer Solution: I used the Bostick & Sullivan Old Workhorse Bromo-Iodizer directly out of the bottle, with no changes to the solution. The solution is easy to coat, and has a strong yellow color that makes it easy to tell where your paper has been coated. It smells strongly of alcohol and should be used only in well-ventilated areas. The bottle should be capped immediately after the solution is extracted.

Potassium Iodide Solution: This chemical comes as a transparent/white crystal solid. I mixed 6 grams of the crystals into 200ml of water to make a 3% solution. I didn't use nearly so much, but I didn't have a small enough mixing container to measure less than 200ml water with accuracy.


Ammonium Chloride Solution: This is a shiny white powder that does not readily dissolve in water. It required a lot of stirring, and left a film of bubbles and fragments floating in the solution. Again, I mixed the same 6 grams of solid to 200ml of water, resulting in a 3% solution.

Sodium Chloride Solution: For sodium chloride, the control solution, I used Morton Kosher Salt. As with the other two dry chemicals, I mixed 6 grams of solid to 200ml of water, resulting in a 3% solution. This is a medium-strength salt solution by standard salt printing guidelines.

The prints were made in windows at my apartment, on a clear, sunny day. I exposed all four prints for 2 hours before pulling them and scanning the resulting images. None of them have been fixed, though I may do a potassium iodide fixing test just to see what happens.

Bromo-Iodizer Print: Unlike any other salt print I've seen, this one came out blueish-green, but mottled with little flecks of a more yellowish green. I was told to expect some issues due to the high alcohol content of the bromo-iodizer, but the green color was totally unexpected.
Potassium Iodide Print: This print is much paler than a normal salt print, more of a tan than a brown. It's still fully detailed, just lighter. I really want to see this printed again without the fogging, so I know what it looks like in a "proper" exposure.
Ammonium Chloride Print: Very similar to sodium chloride, though the pre-exposure fogging makes it difficult to read nuances of hue and tone. I'll have to do more specific experiments regarding the different forms of chlorides to see the exact effects of ammonium vs sodium. If there is a visible difference, it's that the ammonium chloride has a cooler, more purple tone to the browns.
Sodium Chloride Print: Exactly as expected, though unfortunately tainted by the long wait between silver coating and printing. Silver chloride, if left in contact with organic matter (like the paper), will self-expose even in darkness. That results in the violet-brown staining of the paper, and the extreme violet outlines around the image.

So, my final thoughts? I'm very excited to have proven to myself that silver chloride is not the only halide that can be used in salt printing. The potassium iodide image is considerably blander than I had hoped for, but the strange jade color of the bromo-iodizer image gives me hope for future tests. I still haven't tested potassium bromide by itself, or tested non-potassium forms of bromide and iodide. I know from previous experience that potassium chloride isn't the best form of chloride to use, so maybe potassium bromide and potassium iodide aren't the best forms of those halides, either. I'm going to look into obtaining other solutions of bromide and iodide, maybe even some alternate forms of chloride. The ammonium chloride is similar enough to sodium chloride, but I've yet to test pure potassium chloride to see the result. I've only ever used it in a "lite salt" mixture: 50% sodium chloride and 50% potassium chloride.

There's just so much more to do, Spiders!

Thursday, January 14, 2016

Blogging for Thor: What's in a Halide?

The three common silver halide precipitates:
AgI, AgBr & AgCl (left to right)
Hey there spiders! I'm gunna hit you with some SCIENCE!

Modern silver gelatin photography uses the term "silver halide" a lot. In film and in paper, the term gets tossed around in reference to the light sensitive salt used to make photographic images. "Halide" is not a specific chemical, though. There's no such element as "Haline" on the periodic table. Instead, "halide" refers to a group of chemicals: chlorine, bromine, iodine, fluorine, and astatine. So a silver halide is a silver compound with any of those five elements. Two of the silver halides are weird, so I want to go into detail on them!

First off, silver astatide isn't used in photography because astatine is extremely radioactive and compounds using it decay in a very short time. So, while silver astatide does exist, it isn't physically feasible to use for any practical purpose. The short half-life of astatine means that it's difficult to study even in laboratory situations, so the light sensitivity of silver astatide isn't even well documented.

The other weird silver halide is silver fluoride. It exists, it isn't radioactive, but it still isn't used in photography... for the most part. Silver fluoride exists in three forms: disilver monofluoride, silver monofluoride, and silver difluoride. None of these forms of silver fluoride are useful in traditional photography, primarily because they react with water. Depending on the specific fluoride compound, they will either oxidize violently or break down via hydrolysis. Because of the inability to use silver fluorides in combination with water-based chemistry, silver fluoride was long ignored in photography. However, in 1966 a US patent was filed for a process where silver fluoride could be vacuum deposited onto a surface along with gold, and treated with boron trifluoride vapors to create a high-resolution, extremely low-speed photographic surface. It appears, though I'm not an expert at deciphering patents, that this research was carried out in connection with the Polaroid Corporation, by a scientist named Joel M. Peisach. I've had no luck tracking down any further literature or contact information regarding this process, and certainly no examples. It's extremely disappointing, even if the complex process and materials required put this technique far outside the reach of anyone working outside a laboratory environment. Still, it was really, really cool to find out that silver fluoride photography does exist.

Silver chloride, silver iodide and silver bromide are all widely used in different forms of photography. Each compound produces different tonal ranges, color palettes and contrast ranges and functions in different photographic processes. Generally, silver chloride is the form used in salt printing.

Why the big science dump, Spiders? Because I'm all about breaking the rules and getting into the how and why of things. So, who's to tell me that a salt print uses silver chloride? Why can't it use silver bromide? Or silver iodide? Or a combination of two halides? Or all three halides? Why can't it be as halide happy as it can get, Spiders? It's about to get like that, Spiders. I'm searching for ways to make "salted paper" images using silver bromide and silver iodide in addition to, or in place of, silver chloride.

Fortunately, I found this weird stuff called "Old Workhorse Bromo-Iodizer" in my university's alt process lab, and I found Potassium Bromide for sale from Bostick & Sullivan. I need an iodide solution, but I'm sure I can find it. After all, iodine isn't exactly hard to get a hold of. This is going to get crazy, Spiders.

Saturday, June 27, 2015

Blogging for the Baron: Slipped Discs and Salty Duds

Hi there, Spiders. I wish I didn't have a good excuse for missing this week's Thursday update, but I do. Somehow I managed to slip a disc in my lower spine while getting out of my friend's SUV. Normal, every day activity and my spine just decided that it wasn't up to it. So I spent Thursday night and Friday morning in increasing amounts of pain. Then I went to the doctor (thanks Obama!!) and found that instead of a pulled muscle, a particularly persistent cramp or anything else reasonable.. I had torn a disc in my spine and some of the jelly inside had leaked out and was messing everything up. That's not terrifying at all.

So now I have an absolute bucket full of drugs to take. Anti-inflammatories, muscle relaxants, steroids, two types of high-powered painkillers. It's pretty lame, actually. At least so far nothing actually knocks me right out... but then I haven't tried the Valium yet. Today, thankfully, was an improvement. If I'm sitting, standing, or walking... I'm mostly fine. It's just when I try to lean over, or move between positions that my back reminds me that it is most certainly not fine.

My students coating papers
Despite all that mess, I did manage to get to my workshop today. Photogenic Drawing at the Light Factory! I had six students, which was a great number. We covered chlorophyll printing, cyanotypes and lumen prints in detail. We briefly went over the theory of anthotypes, but didn't have time to make an exposure since they take several days. I had planned to include salt prints, and I sorta did... but the paper I used wasn't the right kind of cheap watercolor paper. The silver nitrate solution soaked right into the paper, leaving a blotchy, streaky mess. None of the prints came out, not even a little. It really sucked. But the other three-and-a-half processes were a big hit!

There was another, smaller issue with the cyanotypes. I've been using very old and brown ferric ammonium citrate for months now. I got a large jug of it when the Light Factory moved from their old location to their new one, and I never turn down free photo chemistry! Since getting it, I've mostly been using it for parchment prints, where color and detail get a bit muddled anyway. Originally, though, I did some tests to be sure the brown ferric ammonium citrate would work. It seemed to work fine on those tests, some months ago. I can't find them now, but I distinctly recall doing them....

Left: Green FAC.     Right: Brown FAC.
Anyway, today when we printed with the brown ferric ammonium citrate, all our cyanotypes came out with a strong sepia tinge to the highlights and with duller, more greyish-green blues. They basically look warm-tone or very "antiqued." Almost what you might expect from a tea toning. It's quite odd, but not unattractive. They still had full detail, highlights and shadows. 

Later in the class, I mixed up some green ferric ammonium citrate and the prints from that came out great. Pure whites, navy blues, all normal results. So it does appear that either the brown ferric ammonium citrate has always produced those warm tones, or something has happened to it in the last several months. I'm not sure which.

At least I know about it now, and I can take advantage of the difference. The warm-tone cyanotypes are quite pretty, so I'll be trying those out with some negatives. I might even have to start making new negatives! It even worked out really nicely with just photograms. The yarrow photograms pictured above came out great on the warm chemistry. I really love the look of yarrow sprigs, too. I'm going to have to see if I can get ahold of some myself. The yarrow my student had started wilting pretty fast in the heat, and by the time I got it home, it had curled up on itself. Big bummer. I'm going to try putting it in water and coaxing it back to life!

My students today had great success using digital transparency positives for chlorophyll printing. One of them brought in some historical photographs of faces and some scanned nature etchings from old books. They printed really well! I'm going to have to consider what kind of images I might work with, since I haven't been shooting a lot of actual photographs over the past several years. Still, it's pretty cool stuff. 

Overall, today was very productive. I had a great time, and I'm feeling really inspired to start some new experiments. I hope my students from the workshop feel the same way!

Saturday, May 2, 2015

Blogging for the Baron: Nailed It?

My favorite haul from Liberty! An antique printer's tray!
Hello, Spiders. I've been away for a while, but it's actually been good reasons. Last week I missed my deadline because I was on my way to Liberty Antique Festival with my best friend, Tiffany. We try to go once a year. Since I'll be moving this fall, this was my last time. It's very sad, but this time around was pretty great. I found some gifts for my mother's birthday and Mother's Day (they're a week apart) as well as some cool stuff for me. Successful antiquing, if I do say so myself.

Then, after I got back, there was gaming with friends. Following that, I had to prepare for a check-in with the Arts and Science Council folks that are running my grant program. Following that I had a minor crisis about my grant project (detailed below!) and then I had to deal with the final exam for my students. Even more recently, I went to see a live show of Megan Jean and the KFB. I've been just swamped. It's just been a busy time recently. But the majority of my recent activity has been productive. The crisis sparked a lot of work; I've made a big push on the grant project.

The vile betrayer, now repaired with more
epoxy. I'm waiting to see if it fails again.
Anyway, let's talk about my crisis, shall we? Up until last Sunday (April 26), I had been planning to simply use E6000 silicone epoxy to glue my parchment cyanotypes down onto the slices of osage orange wood that I'll be using as mounts for the grant project. I'd done a test piece and it was doing just fine after several weeks, showing a strong bond and no odd developments. Then, on Sunday evening, I went to photograph the test piece with my DSLR for a higher resolution image. The whole upper half of the parchment had bubbled up and the edges weren't laying flat at all. I was able to easily peel the upper part of the print off the wood with my fingers. The lower half was still fairly stuck down, but having half your art peel off the backing isn't acceptable.

I began to panic. I only have until May 18th to have all 50 pieces produced and ready for the recipients. If a friggin industrial epoxy wasn't going to hold parchment to wood, what could do the job? I hit up Google University, Facebook discussion groups for artists and contacted the tannery where I buy my parchment. Most of the conservationists, woodworkers (parchment is used in some furniture applications) and the tannery recommended using a more flexible, water-based glue. Hide glue, wheat paste, PVA (PolyVinyl Acetate) glue, carpenter's glue, or Yes! paste. I decided to try the Yes! Paste and had great results. The glue applied easily, the parchments appear to be fully adhered.

Except... in further research, I've found that opinions on Yes! paste are sharply divided. While the product, and many reviewers, claim that it is archival, there are a number of conservationists who strongly oppose the use of it. They say that within a decade or two, it begins to yellow and turn brittle. I'm not very concerned about the yellowing, since it's hidden under opaque parchment and unlikely to be able to change the color of the parchment itself. I am quite concerned about the brittleness, though. I don't want the art to fall apart on an owner's wall.

No glue, just nails. Good? Bad? I think it needs 2 more.
There is another idea, which lead to the title of this entry: nails. While I was panicking about what to do instead of glue, I scoffed "I can't just nail it down!"...  except why can't I just nail it down? So I went to the hardware store, purchased a variety of small tacks and pins, and set to work. I nailed down two different parchments and, even without a glue base under the parchment, the nails do an excellent job of keeping the parchment flat. Nails aren't going anywhere. The only problem is that... uh, well, there's nails in my art now. I didn't plan on that, and I'm not sure I like it. They aren't particularly obtrusive, but they're certainly there.

I've been asking around for feedback on the whole nails vs glue thing. A lot of folks have suggested that I make the nails more visible, using brass or copper nails that stand out and complement the color scheme. Or that I use the nails to pull the skin taught as it dries, instead of just using them to hold already-dry parchment in place.

Of course, now I've already used the Yes! Paste on 17 of my prints. Even if I buy some hide glue, which is supposed to be ancient-Egyptian-caskets permanent, at least 17 of my prints are already glued down with a suspect adhesive. So what I'm thinking now is that I won't be consistent. I'll do some of those 17 with regular steel nails, some with brass, maybe even some with copper. Some of the other 23 will just have glue. I don't have to be consistent. I'm already splitting the 50 pieces between wearable art and wall art. The wearable art isn't consistent. Some rings, some pendants, some earrings, some silver, some wood, some brass... I think that I am OK with this body of work being fairly diverse. I'm really looking forward to wrapping it up in the next few days. Then I get to to through and document the whole thing.

Do any of you Spiders have opinions on the whole nails issue?

Left: No Nails. Right: Nails. Which is better?

Friday, April 10, 2015

Blogging for Freya: The Difference in Splitting

Two-Stage Cyanotype, First Test.
I missed my deadline, Spiders, but I almost had a good reason. I was engaging in a new experiment today and it wasn't finished until I got home from game night. Of course, I could have done the experiment earlier in the day... but I hardly ever get work done before 2 PM. Oh well! Next week, Thor! For sure!

Apparently it is possible to print cyanotypes in a very different way than the traditional method. In traditional cyanotypes, there are two active chemicals. Ferric Ammonium Citrate (A) and Potassium Ferricyanide (B). Generally, Parts A and B are added together in equal measure to create a working solution. The working solution is then painted onto the substrate, allowed to dry fully, exposed and developed in water.

According to Mike Ware and a photographer named Jorj Bauer, it is possible to split A and B apart. The process then becomes an application of Ferric Ammonium Citrate to your substrate, dry for 30 minutes (far less time than required normally), expose, then develop by brushing on the Potassium Ferricyanide. Afterwards only a short water bath, instead of an extended wash, is required to clean off excess chemistry. All the development occurs with the Potassium Ferricyanide being added.

The advantage here is that you don't need to mix up working solution, which goes bad fairly quickly. You can keep your coated paper longer, and coat large projects more easily and without waste. Also, because the Potassium Ferricyanide partially inhibits UV light, waiting to add it until after the exposure dramatically increases the sensitivity of the print. A 200-300% increase in sensitivity is possible, at least theoretically. This drastically reduces the time required for exposures, and the depth of the shadows. Again...in theory.

I tried to use this technique today with a photogram on parchment and had... well, it's right up there, Spiders. It isn't a great success. Now, yeah... I took a shortcut and used a hairdryer to accelerate the drying of the Ferric Ammonium Citrate-coated parchment. However, I think the problem lays with how damn thirsty the parchment is. Because it absorbs and holds onto liquids with such tenacity, the Ferric Ammonium Citrate (absorbed fully into the parchment) does not easily interact with the Potassium Ferricyanide (only on the surface). Possibly a bath in the Potassium Ferricyanide might work as a developer... maybe. But that causes problems because even with only two or three minutes of contact, the Potassium Ferricyanide has left yellow stains on the image that did not wash out at all in the water. I'm afraid of trying an acid wash (generally recommended to clear highlights of cyanotypes) because that's un-mixed Potassium Ferricyanide. When combined with acids, Potassium Ferricyanide can produce cyanide gas. Not something I want to mess with.

So, maybe this works really well on paper? I'm certainly going to do some more testing... but I'm thinking it isn't going to be a great technique for me and my parchment prints. Bone, maybe? I hope so. It might solve some of my issues with the bone images self-developing while they try to dry. I'll have to do a test once I get some bone "scraps" I can fiddle with.

For the weekend and next week, dear Spiders, I have other things to play with. Aside from making further progress on my grant project, I've also got to work on a good way to clear the highlights of my parchment prints. I have some citric acid crystals that I'm going to whip up into an acid bath and see if I can get the highlights to clear. Acid helps iron salts dissolve, and that may get the yellow out of the parchment. Since those prints are done traditionally, the cyanide is not going to be released and the clearing bath should be safe. Supposed oxalic acid works really well, but I've been looking around and gotten some good feedback about citric acid. Oxalic acid is fairly unpleasant stuff by my standards, so I'd prefer to avoid it.

Friday, June 6, 2014

Blogging for Freya: Basic Chemistry

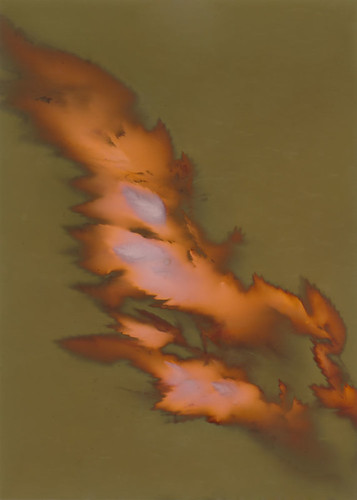
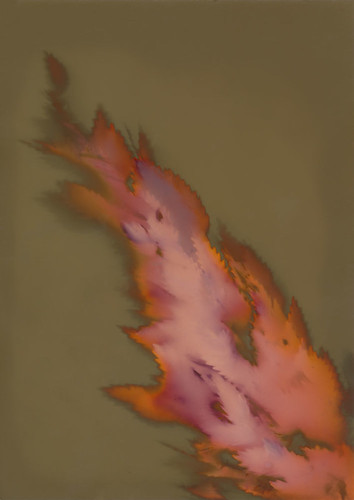
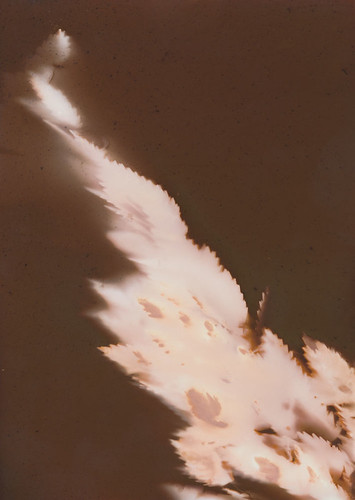
4 hours, regular water
2 hours, basic water
2 hours, acidic water
Ugh, sorry Thor! I'll make it up by posting twice this week. I just lost track of blogging today.


I have previously experimented with exposing lumens in water. Often a paper has totally different characteristics when exposed to moisture, so lumens made in water will tend to display a radically different color scheme than normal. Since both the paper and the printing object are floating in water, contact is limited and the images are blurry, sometimes very blurry if the paper or object are disturbed in the water. Debris can get into the water, moving around and creating interesting background results. The water adds another dimension to the printing process.

Over the last few days, I decided to try something else. I already knew from
other experiments (and just basic darkroom chemistry) that photographic paper reacts not only to moisture, but also to acids and bases. Developer, for example, is basic. Stop bath is acidic. I once tried painting liquid detergent (a strong base) onto photopaper, only have to it turn black within seconds. I knew ahead of time that by adding acids or bases to the paper, I could influence how it developed. So, I mixed up some solutions and exposed lumen prints in either a slightly acidic solution, or a slightly basic solution.

My base solution was just a simple addition of baking soda to hot water. I dissolved the soda completely, though I do plan to do some later tests with larger amounts to see what it does when large amounts are in direct contact with the paper. From these preliminary tests, I found that (as expected) the baking soda solution seems to accelerate the exposure. Normally the paper tested, Fomalux RC Contact Paper, shifts from violet to green over the course of 4-5 hours if exposed underwater. When immersed in the baking soda solution, that time was cut in half. I got a full conversion to the desired orange-green scheme in just under 2 hours. Normally a 2 hour exposure in water is just brown. I'm going to experiment with this to speed up other long-exposure papers like Collodio POP and Harman Direct Positive.

For the acid solution, I used anhydrous citric acid crystals, which I did not fully dissolve. In one test, I sprinkled the crystals directly onto the paper. No significant results, but the areas of contact did show some minor resistance to exposure. In general, the acidic environment did as expected and slowed exposure considerably. The Fomalux paper, after 2 hours, was a dull brown with very little contrast. It seems to affect the background more strongly than the object (possibly not as much acid reaching the paper where it was covered by the object?) because the object was turning orange already while the rest of the paper was still brown.

I'll be trying with some other solutions and concentrations, but I think this technique (especially the basic solution) has some interesting potential. Speeding or slowing chemical exposure of lumens could allow for some fun play with papers that normally expose too fast or too slow. I need to see if I can produce the results without submerging the prints, possibly by pre-soaking the paper. That would allow more traditional, full-contact lumens. That'd be nice; I like detail.