Showing posts with label alternative processes. Show all posts

Thursday, April 14, 2016

Blogging for Thor: The Shape of Things to Come

Silver Geometry Print #2: Silver Nitrate and Cyanotype
Hello, my lovely Spiders! I'm doing very well; I hope you are, too? Great.

Last week, I talked about beginning a new project. For the moment, I'm calling it "Silver Geometry" but that's likely to change since I've already made at least one image without any silver in it at all.

Step-by-step for
Silver Geometry #1
The biggest challenge so far is the fixed 2 day exposure time. With such a long exposure, the d-max of some chemicals is reached too quickly. If I want to preserve the colors created various levels of exposure, I need to work more quickly and then cover the area with an opaque block.

My first experiment using cyanotype and potassium dichromate provided a sad example of this kind of d-max failure. I was attempting to add rectangular areas of reduced exposure to the circle-based chemigram, but even leaving the opaque rectangles in place for 6-8 hours at a time, the exposure equalized so rapidly that no trace remains in the final image. There should have been four lighter areas intruding into the circular pattern. They're gone.

If I want to continue using faster-reacting chemicals like cyanotype and dichromate, it appears I'll have to create a color with varied exposure, get it to whatever tonality I want, then "seal" it by placing the opaque shape back over that area for the rest of the exposure.

There is good news, though! The first image worked out wonderfully and the
third image came out nicely, too. The third image hasn't got very strong shadows from the paper and tinfoil triangles I used, but it was enough to make faint impressions in the silver rectangle on the right, and to create a gradient in the uppermost cyanotype stripe.

The second two prints also showed the rather lovely potential from painting the chemicals next to each other, and allowing them to overlap and mix. I'm in love with what's happening on the third image where the silver nitrate and cyanotype solutions mixed together.

In the future, I'm going to be incorporating kallitype chemistry, possibly some toners, and experimenting with painting different salts onto the page to alter the color of the silver nitrate stains. This project is looking so fun, Spiders!

I'll be using Instagram to document the progress and layout of each print as I move through the stages of designing the geometric drawing, painting the chemistry onto the paper, setting up the photogram objects and then moving them around during the exposure. So if you want to follow me for updates, that'd be pretty awesome. I love seeing Spiders on social media!

Thursday, March 24, 2016

Blogging for Thor: Stepping Up to the Wet Plate

Today, I made my first wet plate that I actually made myself from start to finish. It's pretty cool. The exposure came out a bit dark, though, which is sad. And it's suuuuuper dusty.

I tried dropping the keys I was holding about 4 seconds before the end of the exposure, but it didn't really register. It just made the image a bit blurry. Though, the exposure was 75 seconds long, so I'm sure some of that blur is just my hands moving.

Overall, it was an enjoyable experience. I wish it wasn't so toxic, expensive and involved to make wet plate images. I'd love to shoot my buddies up here. I have so many ridiculously good looking friends here in Boston, it'd be awesome to make wet plates of them all.

The coating came out fairly well, though. That's nice.

Thursday, January 14, 2016

Blogging for Thor: What's in a Halide?

The three common silver halide precipitates:
AgI, AgBr & AgCl (left to right)
Hey there spiders! I'm gunna hit you with some SCIENCE!

Modern silver gelatin photography uses the term "silver halide" a lot. In film and in paper, the term gets tossed around in reference to the light sensitive salt used to make photographic images. "Halide" is not a specific chemical, though. There's no such element as "Haline" on the periodic table. Instead, "halide" refers to a group of chemicals: chlorine, bromine, iodine, fluorine, and astatine. So a silver halide is a silver compound with any of those five elements. Two of the silver halides are weird, so I want to go into detail on them!

First off, silver astatide isn't used in photography because astatine is extremely radioactive and compounds using it decay in a very short time. So, while silver astatide does exist, it isn't physically feasible to use for any practical purpose. The short half-life of astatine means that it's difficult to study even in laboratory situations, so the light sensitivity of silver astatide isn't even well documented.

The other weird silver halide is silver fluoride. It exists, it isn't radioactive, but it still isn't used in photography... for the most part. Silver fluoride exists in three forms: disilver monofluoride, silver monofluoride, and silver difluoride. None of these forms of silver fluoride are useful in traditional photography, primarily because they react with water. Depending on the specific fluoride compound, they will either oxidize violently or break down via hydrolysis. Because of the inability to use silver fluorides in combination with water-based chemistry, silver fluoride was long ignored in photography. However, in 1966 a US patent was filed for a process where silver fluoride could be vacuum deposited onto a surface along with gold, and treated with boron trifluoride vapors to create a high-resolution, extremely low-speed photographic surface. It appears, though I'm not an expert at deciphering patents, that this research was carried out in connection with the Polaroid Corporation, by a scientist named Joel M. Peisach. I've had no luck tracking down any further literature or contact information regarding this process, and certainly no examples. It's extremely disappointing, even if the complex process and materials required put this technique far outside the reach of anyone working outside a laboratory environment. Still, it was really, really cool to find out that silver fluoride photography does exist.

Silver chloride, silver iodide and silver bromide are all widely used in different forms of photography. Each compound produces different tonal ranges, color palettes and contrast ranges and functions in different photographic processes. Generally, silver chloride is the form used in salt printing.

Why the big science dump, Spiders? Because I'm all about breaking the rules and getting into the how and why of things. So, who's to tell me that a salt print uses silver chloride? Why can't it use silver bromide? Or silver iodide? Or a combination of two halides? Or all three halides? Why can't it be as halide happy as it can get, Spiders? It's about to get like that, Spiders. I'm searching for ways to make "salted paper" images using silver bromide and silver iodide in addition to, or in place of, silver chloride.

Fortunately, I found this weird stuff called "Old Workhorse Bromo-Iodizer" in my university's alt process lab, and I found Potassium Bromide for sale from Bostick & Sullivan. I need an iodide solution, but I'm sure I can find it. After all, iodine isn't exactly hard to get a hold of. This is going to get crazy, Spiders.

Sunday, October 18, 2015

Blogging for Sol: Waxed Paper and Olive Oil

Albumen print from a waxed paper negative
Hello again, Spiders. I'm terribly sorry for missing last week. It's still a struggle to work with so much thought devoted to other matters. Without work, I feel like I don't have anything to post, so the deadline slips past and I just feel sad. But, I'm trying to be more productive here at grad school. After all, I'm paying all this money, I should be productive, right?

This week, I want to talk a bit about paper negatives. I may have mentioned them before, but I've never made one before. They're actually quite simple to make. All you do is take a digital image, convert it to black and white, invert it, print it out and then apply oil or wax to the paper to make it translucent. That's it! Once those steps are done, you have a paper negative and you can ride off to print forever!

I made my first paper negative during the alt. process class where I'm TA'ing. None of the students were trying it out, so I made a quick laser print of an old photo I'd shot at one of Megan Jean's performances in Greenville, SC. I always did think Megan Jean would be particularly suited to alternative process prints, given the retro-Americana vibe of their music.

One of the other grad students had provided two white candles for wax, and we had a hairdryer to melt the candles. So I warmed up the candle with the hairdryer until it was soft enough to be pliable and began rubbing it across the paper negative print like a crayon. As it went, it left behind enough melted wax to soak into the paper fibers and make the image translucent. This is fairly time-consuming, taking about fifteen minutes at least to warm up the candle and get an even-ish coating of wax onto the image. It could be done much more quickly by melting paraffin or beeswax in a tub so the paper negative can be dipped in, or the wax brushed on. That would probably give a better, more even coating, too.

From the waxed paper negative, I made an albumen print that seems to have fairly good detail. You can see it yourself above, with a larger version linked HERE. My printing isn't perfect, but this was also my first albumen print. I don't know that the greater tonal range of albumen is enough of a draw for me to continue using it over salt prints. Salt prints are, after all, much easier to produce.

While I was working on waxing the first negative, I spoke with Jessica Somers (the professor teaching the course) about waxed negatives vs. oiled negatives. She said that her experience had been that oiled negatives took less time to make, but there was a problem with the paper getting over-saturated and continuing to shed oil for a while after coating. I decided to investigate for myself, using spray olive oil (the same kind used for coating pans and dishes for cooking). Spray would allow for easier, faster application and should apply a lot less oil than brushing or soaking the paper.

I was able to easily oil a second laser-printed copy of the same image. A few sprays from a can of olive oil began saturating the paper very well. I helped things along by rubbing the oil into the paper from the back with a paper towel, but I'm not sure it was strictly necessary. It may have helped remove extra oil, because after the paper dried (in about half an hour), it's been perfectly clean. Slick, yes, but certainly not shedding any extra oil.

Left: Oiled Paper, Right: Waxed Paper
Here are images of both the waxed negative and the oiled negative. Overall, I prefer the oiled negative. It's faster and easier to make, requires less preparation and seems to produce a smoother negative. The waxed paper has lots of imperfections and areas where the wax coating is rough and showing stroke marks. The oil hasn't got any of that.

So, Spiders, I suggest that if you're lacking funds or access to fancy-schmancy digital negatives printed on Pictorico or other transparency films, paper negatives are a cheap and fast alternative. Just be aware that they require more exposure time, reduce your contrast and are going to blur some fine details. But with alternative processes, is anything but the reduced contrast really a consideration? Eh, I guess that some people might be miffed about the fine detail, but those people are weird.

I'll see you again soon, Spiders. Hopefully next week!

Saturday, December 27, 2014

Blogging for Balthazar: Cyanotypes go Metal!

First Cyanotype Parchment Ring
It's a bit after Christmas, so let's celebrate with a new blog post! Yes, I took some time off for the holiday, and I just haven't really been mentally up to blogging. My dog's still not doing well after his surgery, and the holidays have been a bit hectic even aside from that. Plus, I think my family may have infected me with another bloody plague. I'm certainly coughing more than I should be.

Anyway, I know you're way more interested in photographic insanity than my biographical drama, Spiders. Let's get down to it.

Troy, one of the awesome guys who runs the Flaming Chicken Studio here in town, decided to put together a last-minute Holiday Art Sale. It went really well, despite the late date and some other events happening on the same day. In getting ready for it, I was working on some more of my attempts at making cyanotypes into practical art. The latest version of this has been cyanotype jewelry. Now, making my small cyanotype bones into jewelry has still proved too difficult for me to manage. I lack the equipment and skills to efficiently build bases, settings and findings. I was able to find another way, however.

Tracing paper templates to make the parchment blanks
I combined a ready-made, adjustable ring base with one of my cyanotype parchment prints. Using a bit of E6000 silicone epoxy, I just attached a tiny print onto the ring base, creating a wearable cyanotype. The process could use some improvements, like some kind of protection against scratching the print itself, but it works on a basic level.

After that success, I've gotten the supplies for further experiments. One of the biggest challenges is simply cutting the right size piece of parchment. It shrinks and expands slightly during the washing and drying of the print, so getting the cut parchment to fit exactly into a ring or pendant isn't easy. I'm hoping for some good results with this batch!

Paper blanks ready for coating!
Even better? This research may actually fund itself. If it goes well, I might even start using my Etsy store! Wouldn't that be crazy?

I don't know if I'll try to expose all of these, but I do want to get started right away. In the dead of winter, I don't have a lot of choices for floral samples. I might even print out some very small negatives on transparency or vellum paper and see if I can do some cyanotype jewelry with photographs instead of photograms. Wouldn't that be novel, Spiders? Actually using a camera?

Thursday, December 4, 2014

Blogging for Thor: Aggregated Datas

Hello, Spiders! I'm feeling much better, and even doing some more anthotype printing. It's slow going, given the weather and lack of sunlight, but I'll manage. I scanned a small crop (4 prints) and I'm labelling and sorting the information now. I may post some results later this weekend.

In other news, a huge survey of alternative process photographers was completed, compiled and released recently. It has some very interesting information! Check it out Over Here. That post is in English, but the rest of the blog is in Dutch, which I do not speak. Still, it's nice to see another active alt. process blog!

The biggest point of interest to me regarding the survey is the split on the issue of what is and what is not "alternative" photography. For me, silver gelatin and color film processing (as base processes, not modified by something like mordançage) are not alternative. They're traditional photography. Digital is digital, film is film and alternative is "other". It's a clumsy, messy grouping, but hey, it mostly works. Artists aren't very good at deciding what to call things anyway.

Even more than the simple debate about film being alternative or not, is the divide on what else is alternative. Judging by the reported statistics, there is a not-insignificant number of self-identified alternative process photographers who do not consider historical photographic processes to be alternative. If they're not alternative... what is??

Some very enlightening, and very confusing, data awaits.

Thursday, August 14, 2014

Blogging for Thor: Too Alternative?

I don't enjoy feeling like a hipster, but I end up feeling that way quite often. Talking to non-specialists about my work is often not an enjoyable experience. When I say I'm an artist, the natural question is what kind of art I make. So I explain that I'm a photographer. Their eyes light up! Photography! That's something anyone can do! It's so easy and relatable! They do photography! They have a camera, they take pictures. They understand me!

What kind of photography do I do, they ask, eagerly. That's where it stops. They expect an answer like "landscapes" or "portraits." Instead, I do alternative processes. Not even 'normal' alternative processes like wet plate collodion, which at least uses a camera. Nope. I use lumen printing and anthotypes, which even most photographers have little or no familiarity with. My subjects are leaves and flowers, but they aren't rendered in the familiar way. My work isn't accessible.

So what can I do? I explain that I do alternative process work. Blank stare. I say some words like "contact printing" and "cyanotype" or "non-silver processes"... and more blank stares. At best, there's a flicker of interest and maybe they ask how it works. Another stab in the gut. Explaining alternative processes has two possibilities.

1) An in-depth explanation of light sensitive materials, chemistry, paper treatments and different printing materials. This often results in vacantly blank stares.

2) "It's magic!" Which often results in laughter (forced or real) or in slightly offended looks. It's just one step above the true hipsterism: "You wouldn't understand it."

I have had some interesting discussions with regular (anyone who isn't an alternative process photographer) people about my work. I've had fun talking about my work with them, but it's a halting, slow conversation and far more often I find myself trying to avoid discussion about my work because of previous experiences.

It's just something that bugs me. I get people that say my work is colorful, pretty and interesting. I get compliments and questions, I do. I like that. I love doing my work. It's just a bit of a bummer that the stuff I really love, the chemistry, the records, the experiments, the trials... that's not something I can have easy discussions about. So for all you academics out there looking for someone to talk about pre-Roman Gaulish culture, or the architecture of ancient Sumeria... I feel for you. I really, really do.

Also, I totally love ancient Sumerian architecture. Let's chat!

Thursday, July 17, 2014

Blogging for Thor: Teaching Spiders about Salt

Salt print made during a demo with
tap water and fast-food salt packets.
It doesn't get any less exacting than this.
Well, Spiders, I've been talking about salt prints for a while now. I've finally set aside some time to document the process and write a short guide to making them in your kitchen. Maybe not literally in your kitchen, because everything I've tried to remove the silver stains from my counter has failed. I've got a nice splatter of brown dots there and they show no signs of going anywhere. If you take care to avoid and spills, drips or splatters, you should be fine. Then again, you're spiders and you don't have kitchens. Just work anywhere, really.

Salt prints aren't complicated. They're also not very dangerous. You can purchase the silver nitrate required in a pre-mixed low-concentration solution. I bought my 15% silver nitrate from Bostick & Sullivan. Here's the link to the specific product I used. 100ml should last a fairly long time, since you only need a single eyedropper full to coat a 5x7 sheet of paper. Each eyedropper is maybe 1ml.

By avoiding powdered silver nitrate, you significant reduce the risks of the chemical. In its dilute, liquid form, it won't burn your skin or get into your respiratory system. It can still cause some nasty harm if it gets in your eyes, but wearing glasses or goggles will protect you. At worst, it will cause stains on counters, skin and anything else organic (including plastics... like plexiglass and acrylic). So what safety gear do you need? Gloves and glasses. The most basic of chemical safety practices will be entirely sufficient.

I am assuming that you use 15% liquid silver nitrate solution. I won't give any details about how to mix the solution yourself, because I never do that. I don't like caustic chemical dust in my house.

Now, onto the actual process! Here's the short, simple version first.

Basic Materials


  • Salt (approx. 10-100 grams)
  • Water (approx. 1 liter)
  • Brushes (foam, hake or flats) or a Puddle Pusher
  • Soaking basin or tray
  • Jug or glass to mix salt water in
  • 15% silver nitrate solution
  • Eyedropper
  • Rubber gloves
  • Protective eye goggles or glasses
  • High-quality watercolor or printmaking/drawing paper
  • Picture frame or alternate exposure method
  • Negatives or photogram objects
  • OPTIONAL: Hair dryer
  • OPTIONAL: Photographic Paper Fixer (diluted to 25% regular working strength)

Simplified Step-by-Step Instructions


  1. Gather your materials and set up!
  2. Mix up a 1-5% solution of salt water.
  3. Soak your paper in the salt water for at least 10 minutes.
  4. Dry completely!
  5. Use the eyedropper to apply a line of silver nitrate across the top of the salted paper.
  6. Spread the silver nitrate into a thin, even coat with a foam brush.
  7. Dry Completely!
  8. Place a negative or photogram object on the coated paper.
  9. Cover the paper and your negative/object with glass. Real glass, not plexiglass.
  10. Place in the sun for ~10-20 minutes.
  11. VERY OPTIONAL: Rinse the print in a salt water bath for 5 minutes to remove extra silver. 
  12. OPTIONAL: Fix the print in regular photo fixer (diluted to 25% strength) for 1 minute.
That's it. That's the entire process! Well... basically. I can, and will, go into a bit more detail. Actually, a lot more detail, my arachnodroid friends. The rest of the write-up is already over 1000 words long and it's still not done. So that's going to be broken off into a second entry. Stay tuned, spiders!

Friday, June 13, 2014

Blogging for Freya: Stumped

I know it seems weird, considering how often I miss my Thursday deadline and end up posting on Friday, but I do have a backlog of ideas for posts. Right now it's 5 of them, and I've really been wanting to dive into one, but it turns out to get more complex each time I start on it. It has to do with categorization in photography. What's the difference between a chlorophyl print and an anthotype? Is this a chemigram or a lumen print? Are my un-developed cyanotypes lumen prints? If I dunk a lumen print in developer, is it still a lumen print?

This may be developing into a serious taxonomically induced existential crisis. I don't know how to categorize a lot of the work I'm doing now. It bugs me sometimes, mostly when I get told that I'm labeling my processes wrong. If I make a "lumen print" with liquids instead of solids, now it's a "chemigram" for some reason. The whys and whens of what to call different photographic techniques are messy.

Sometimes, I'd really like art to borrow a bit more from science and actually define things. Scientists know what they mean when they say something is organic or inorganic, metallic or non-metallic, a semiconductor or a superconductor. I want some taxonomic certainty!

Thursday, May 1, 2014

Blogging for Thor: Luminous Chroma

My best chromo-lumen!
Hello spiders! It's 4 AM and I'm really tired. You're not, I know, because you're just bundles of code scattered through a series of tubes. Whatever. You don't understand me, spiders. But you get me, you know? I love you, spiders.

So anyway. As you know, I love lumen prints and recently I've been experimenting with the chromoskedasic sabatier technique. Oh, actually I just reviewed the blog to provide a link to me talking about chromo (so much shorter to call it that), but didn't find anything. So you don't know that I've been experimenting with that process! I'll have to devote a blog to talking about it! Cool. Anyway, I totally have been doing that. And lumens. Back at SPESE 2013, when I was taking Angela Wells' great workshop on chromo, I asked her if she'd even combined the technique with lumen printing. She had not, since she had not heard of lumen printing. Another guy there, Joshua White who teaches up at App State, is very much into lumens but was just learning about chromo and had never combined them. I did some research online and I can't find any results of anyone that does combine the techniques.

I like the contrast!
Anyone except me! WOO. Turns out you totally can combine them. All you need to do is take a lumen print, dip it in very dilute developer (or it'll just vanish because lumens are massively overexposed by their nature) for a few seconds, wash it off in water and then proceed to chromo all over it as normal. It turns out pretty awesome, actually. I find that it's a great way to add visual interest to empty areas of a lumen print, creating a much more dynamic figure-ground relationship than most lumens tend to have. It also brings more of a personal, organic touch to the lumen process. There is a lot of potential to explore, especially for artists that have fine manual dexterity and some skill at painting. Chromo is basically painting with chemistry, so this combination of techniques can effectively be used as a very alchemical form of hand-coloring. Hand-coloring with metallic deposit precipitation. The best kind of hand-painting, obviously.

The puke-green is actually
oil-on-water shiny metal.
I'll be updating my Chromo-Lumen Flickr Gallery with future images for you lovely spiders (and any humans, lovely or not) to check out. So far I just have four, but I have a lot of boring lumens to attack with this technique!

My only regret is that chromo prints still need to be fixed. Just like lumens, they lose a great deal of saturation and vibrance when fixed, but it's pretty much necessary. As I lament in my last post, the intensely reflective, metallic nature of chromo prints just can't be scanned or photographed. It needs to be seen physically. That means the print needs to be the final product, not a digital reproduction, and that... means fixing the prints. Le suck, but what can you do?

Sunday, February 2, 2014

Blogging for Spiders: Back in Blue

I haven't been feeling particularly artistic lately, my dear spiders. You've no doubt noticed that by the recent trend of blogs falling further and further behind on the weekly schedule and generally being a bit gloomy and lacking in new projects or progress on old projects. Winter isn't my most productive time, but that's hardly an excuse. I've just been in a rut and battling the fog-monster. Today I launched a massive attack on his nebulous ass. I got out into my lab and did some work.

Previously, I've talked about printing cyanotypes on parchment. It's pretty awesome, because the parchment imparts a remarkable amount of texture that rarely manages to detract from the subject matter. The organic nature of the material, and the fact that I print on scraps instead of properly processed, sized and cut sheets, means that each piece has a different texture, surface, thickness and quality. The scraps I get come from any of four types of parchment (deer, goat, sheep, calf), but I have no way to tell which I'm actually using.

Just to clarify, when I say 'parchment', I do not mean the stuff you buy at the grocery store to bake on. I do not mean the vellum you buy at office stores to put in wedding invitations. It's thin-cut and treated animal skin, the kind of material used in medieval documents and illuminated manuscripts. If you'd like to buy some of your own to play with, I get my supplies from a tannery in New York state: Pergamena.

Eventually I would love to order a full-size skin and do large format cyanotype contact prints, but at the moment that isn't feasible since I don't have a place to work large enough for that, or a way to handle washing, drying and pressing a skin that big. Cyanotypes printed on parchment must deal with the qualities of the material. Parchment, despite being used as paper, behaves very little like paper. It reacts differently to moisture, heat and tension.

So, how do you print cyanotypes on parchment successfully? Let me 'splain to you.

Coating the Parchment

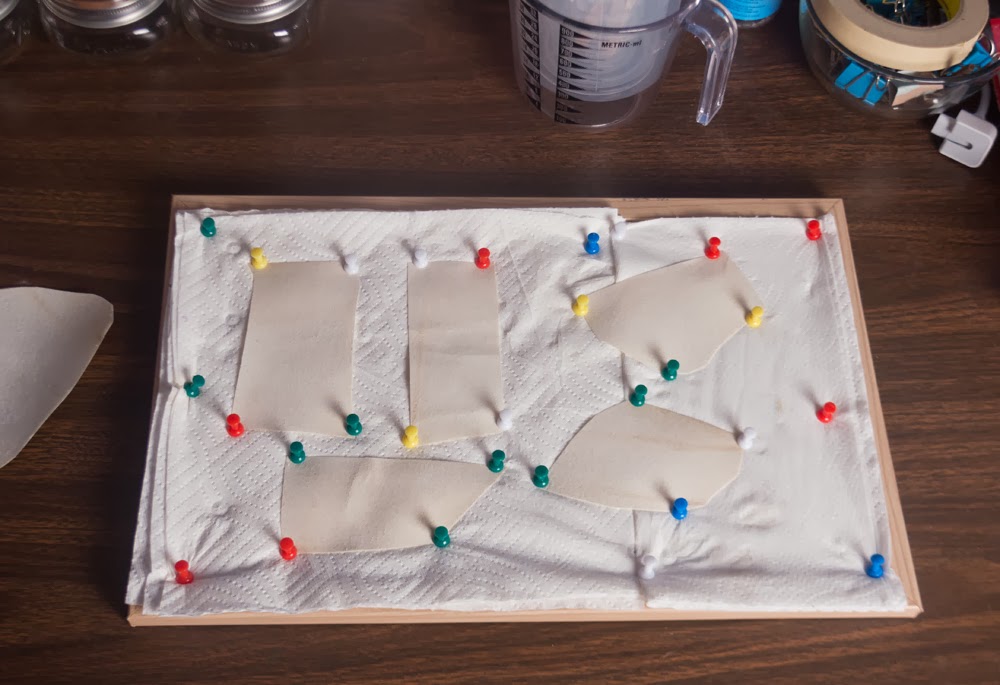
Stretched and pinned parchment sheets

First off, your parchment needs to be stretched before it can be coated. That's because the parchment will curl and warp in response to moisture. It will then dry in that shape while you allow the chemistry to dry. You'll want to pin, tape or otherwise secure your parchment to a solid surface before coating. This will allow the parchment to keep its shape much better than just trying to coat and dry it loose. Personally, I use a small cork-board covered in paper towels (extra absorbent padding, plus easy to clean by replacing the towels) to handle smaller pieces of parchment. Larger sheets are taped down to pieces of particle board. You may be able to get away with pushing broad-based pushpins and instead of spearing through the parchment, just using the plastic to hold it in place. I try doing that, because I don't particularly like holes in my parchment, but it doesn't always work out. Especially later.

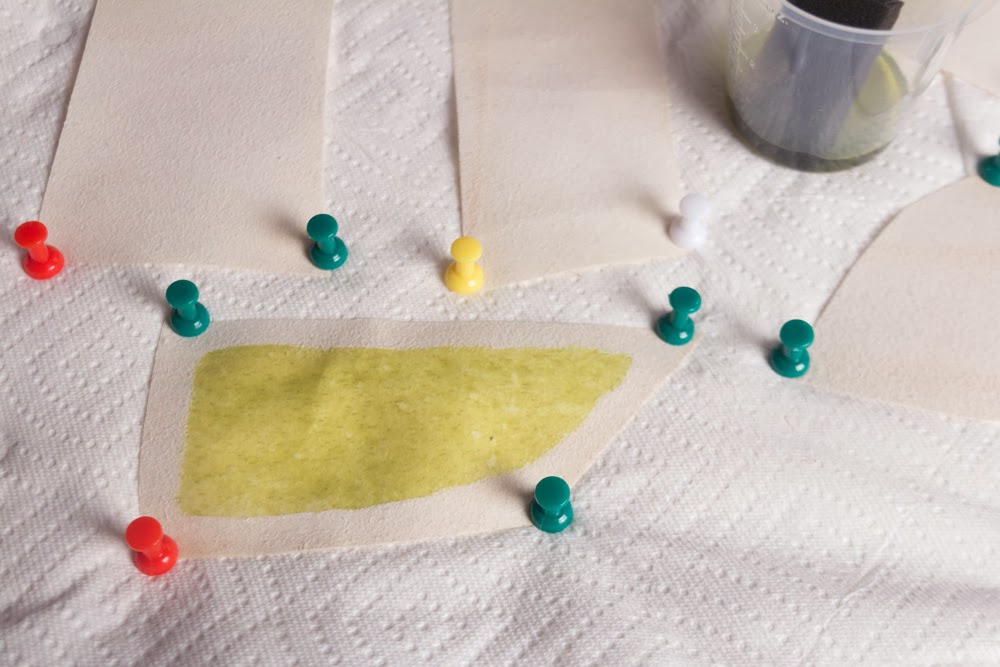
One sheet of parchment coated.
When coating your parchment, I recommend a small foam brush. You don't want to over-saturate the parchment. Depending on the type of parchment you're using, it can be anywhere from slick and hard (the chemistry will try to run right off and you really have to work it into the material) or it can be soft and suedey (the chemistry is sucked right in and absorbs very smoothly). The small foam brush lets you get into small corners, which is great if you're using small sheets of parchment. You'll have to decide for yourself if you want to cover the entire surface, or leave an un-coated border. I like leaving the border, but I've tried it both ways and been satisfied with the results. The border just lends your piece a nice, defined edge.

Drying the Parchment

Once you've coated your parchment, you have to let it dry. As with all cyanotype materials, do this out of light. A warm, dry, dark environment is best if you can manage it. I keep mine in a cabinet. Allow parchment to dry fully, until it retains absolutely no moisture. This may take between 1-2 days depending on your local humidity and temperature. The dry parchment will be stiffer and far less flexible than it was when you started. After being exposed to moisture, the parchment never really gets that soft, flexible feeling back. I've contacted different tanners and they all say they's just how it works. They recommend not wetting your parchment, but obviously that isn't an option for anyone wanting to do photography on it. There's some additional chemicals and steps the tanners themselves use when dyeing and tanning the hide that keeps it supple, but it's not exactly stuff you can do at home (or want to, as it stinks). Just deal with the stiffness of the final product.

Exposing the Parchment

Exposure is fairly standard. Close contact between your negative or object and the chemistry is key. Be forewarned that because of the texture, surface quality and stiffness of your parchment, no cyanotype will ever come out as detailed and clear as it will on paper. Ever. It's just a factor of how the parchment is. I don't even try negatives anymore, they were too indistinct and fuzzy for me. I only use parchment to do contact prints with plants and objects.

There is one note here to be made: your exposures will be longer than normal. There's something about the parchment that makes it resistant to exposure. Chemistry on parchment doesn't hold detail very well, so you need to really burn it in. It's extremely common to find that your latent image is much more detailed and vibrant than your developed print. Check the example below.

Left: Latent Image. Right: Developed Image.
As a result of this detail loss, even during extended exposure (this was 2 hours), I scan my latent images. We've already discussed how I feel about archival permanence. I see no reason to discard such a powerful image just because it isn't chemically stable.

Washing the Parchment

Washing (developing) parchment cyanotypes (I call them cyanovellums) is also perfectly simple; just dump them into water and stir them around. They take longer to wash than regular paper, especially if the parchment itself is thick or soft. The thin, hard, slick parchment washes pretty fast and doesn't respond nearly as much to moisture as other types. The problem with washing cyanovellums is that whole issue parchment has with moisture.

Drying the Parchment

You can't dry them quickly, and you have to stretch them or they'll curl up like mad. If you try to dry them with an iron, they'll shrivel up like a slug under salt.

What you end up doing is drying them in a book, or under weight. Pad both sides of the parchment with towels or something else absorbent, then press the whole thing under heavy weight. Large books do great for this, but they can occasionally transfer ink from their pages onto the parchment. Might be interesting, but more likely to be a distraction from your image. Experiment with that, but go into it expecting to experiment. If you don't want any ink transfer, just put something absorbent between your parchment and the paper.

If you'd rather stretch and dry the parchment, you can do that. You will have to pin through the parchment. There's no way to use the weight of the pushpin's plastic to hold the parchment in place as it dries, like you can try doing while coating. There's too much water in the parchment that has to get out and the curling is going to have some force behind it. Stretch the parchment tight and pin it in place securely. You may choose just to pin the corners, or pin regularly around the sides. Because I don't like having holes in my parchments, I tend to prefer the weighted press method of drying. Stretch-n-pin does offer a bit of a chance to 'cheat' and dry the parchment faster. You can use a hairdryer on low, held several inches from the surface of the parchment, to speed up the drying. Don't hurry too much, even a small parchment will take a good 20 minutes or so, but you can manage it.

Either way, pinning or pressing, if you don't cheat with heat then you can expect it to take 2-3 days to fully dry your parchments. If working during a hot, sunny day then you can leave your press or stretching board outside and let the sun help you dry. That speeds up the process considerably!

Finishing Up

Now, if you've done something wrong, or your parchment just isn't cooperating, you can always re-soak and re-dry the parchment. Just remember, it's never, not ever, going to be as supple and flexible after being washed as it was when you first started.

Each cyanovellum is unique. A combination of the hide's texture, size, coloration and surface along with the variations in the cyanotype process itself will create an absolutely individual piece. You can go further and tone your cyanovellums, but the toning processes may not work exactly the same on parchment as they do on paper. For example, most bleaching processes turn cyanovellums golden orange.

Since the tactile appearance of cyanovellums is so striking, I prefer to present mine in shadowboxes. I generally choose a box with a natural wood finish, then cover the back of the box with either a black or natural, unbleached cloth. I use small sheets of cardboard or foamboard to raise the cyanovellums off the background, 'floating' them against the background. Hot glue makes for a good seal and can be easily removed from the back of the parchment without causing damage.

Friday, January 3, 2014

Blogging for Thor: Dust in the Wind

Six different anthotype dyes in their raw forms.
Man, I'm really bad at remembering what day things are. I was so happy with myself today, too. I ran errands and got things done. Like an adult. Then I came home, forgot it was Thursday and went to bed. Thankfully, I tend to wake up at 3 AM or so, stay awake a few hours and then go back to sleep. I've convinced myself that so long as my blog is up before dawn on Friday, it's still Thursday. Totally sound logic, right?

Today's blog is going to be short, though. It's mostly a plug for something else I'm doing. I decided to start photographing the different dyes that I use to make anthotypes with! Starting with the dry powders, I'm taking proper photographs of each dye. I'd really love some kind of big, interactive website where you can click on a picture of the dye and have it bring up a sample sheet showing what the dye looks like before and after exposure, with comments on how to prepare it. That'd be pretty awesome, but I have no idea how to make that work. Maybe some sort of weird eBook internet sorcery.

On other fronts: the weather has just been terrible lately. Clouds, rain, fog, clouds, rain, clouds. Even on 'bright' days the light is so filtered and low-contrast that there's hardly any UV light at all to expose prints with. It's officially the off-season for sun printing. As a result, I need to do something else and it seems like a good time to work on articles (haha, not this blog, no one reads this blog) and that vague idea for an anthotype book I keep telling myself I'm writing. Or the visual reference guide to lumen printing papers. For right now, though, I'll be focusing on the anthotype dye documentation.

The complete set of current photographs for this project is here, on my Flickr.


Thursday, December 12, 2013

Blogging for Thor: Sighs and Size

First off, two hurrays. One, I turned 27 yesterday and that's pretty cool. I haven't managed to drop dead or poison myself with photo-chemistry, yet. Two, I'm actually posting this blog on Thursday instead of Friday. I'm sure Thor is very pleased with me. He must be, since the last few days have had tons of sunlight. It's just been great. Cold as balls, but great.

I had an unscheduled post earlier this week about my Cyanotype Totes project and how that was going. I also talked a lot about functional art vs non-functional art, selling art and other things. It was pretty fun. For today's post, I'm really just planning to talk about the results of the second half of that functional art experiment: my silk scarves. We'll see how much I stick to the plan.

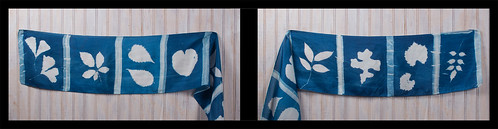
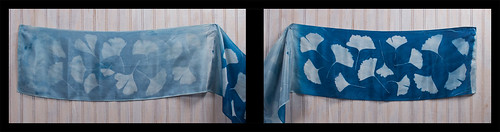
Let's get this out of the way, shall we my spiders? I do not feel any of the cyanotype scarves are successful enough to sell. All of them are defective in one way or another. Only one of them is even partially acceptable. This was my first time dealing with cyanotype chemistry on large textiles and I learned a few things. I've mentioned them in passing in earlier posts about this project, but I'll recap briefly here.


First Problem: I did not dry them correctly, resulting in moisture gathering across a crease near the center of each scarf. The moisture prevented the chemistry from setting correctly, creating a white line down the middle of all four scarves. There is no way I know to fix this after the fact, so I had to just deal with it. In the two long scarves, I was able to hide this flaw. It still bothers me.

Second Problem: I was not prepared to deal with the size of the scarves. I don't have glass big enough to cover them or backing large enough to handle them. This meant I was either forced to go glass-less, as on the two squares, or expose in sections as on the two long scarves. Without glass, my images are low-contrast and blurry. Exposing in sections results in uneven tonality and exposure, and makes it easy to accidentally reverse one section. That happened both times.

Third Problem: Silk isn't easy to document. It's extremely reflective and so bright that individual threads tend to show up clearly, making the fabric look gritty or coarse instead of smooth and, uh, silky. I got some better results with later shots, but anything close up isn't too thrilling. It's also just bloody hard to shoot scarves. They're big and hanging them up flat is hard because they want to shift and move around. They don't even look that good hung up flat, and they isn't how they're meant to be seen or used. I wish I had a mannequin or dressmaker's dummy to model them, but I don't. I may be able to get a friend to model them at some point, though.


Generally, I'm just not happy with the scarf experiment. It was a lot of work, trouble and materials for results that I'm not a fan of. I might try again later; I do have some ideas on how I could deal with the difficulties I encountered. Drying them properly isn't that hard, ironing them properly is something I can learn. I've talked to some folks that do fabric cyanotypes regularly and gotten a good bit of advice. You can use spray adhesive or silkscreener's adhesive to keep the fabric flat and in place while laying out your negatives/objects. You can buy a cheap glass door from the home improvement store to use for your frame. Cool stuff like that. It's just that the more extra items you need and the larger everything gets, the more I think cyanotype scarves may not be that great. I haven't even tried selling any yet; I have no idea if there will be any demand. Maybe if my totes go over well, I'll try scarves again.

One idea I'd like to play with is applying the cyanotype chemistry to only areas of the scarf instead of across the entire surface. I could dye the scarf before applying the chemistry, then put several images on the scarf in different locations. Each different image can be exposed and developed on its own, even sequentially. That'd take a lot more time because of having to go through the whole process of applying chemistry, let it dry, exposing it and then developing it, all for each individual image. The final result might be really cool though, since I can use different dye techniques on the scarf before the chemistry is applied and get really fun backgrounds.

If you want to view all my current photos of the scarves, check this Flickr Gallery. There are detailed comments about each scarf on Flickr.

Friday, December 6, 2013

Blogging for Thor: Really, Thor? Clouds?

I would say that I intentionally delayed today's post to spite Thor because he ruined my plans. But, no, I didn't because it's not wise to spite lightning-tossing steroid-abusers and because actually, I just fell asleep about 9 PM and woke up just now at 3 AM. Hurray...

Seriously, Thor did ruin my plans. I had hoped to finish up a project today and get it documented, but that didn't work. As part of my Christmas gifts this year, I purchased some unfinished tote bags and silk scarves from Dharma Trading. Ten totes (they sent 12 for some reason, but I'm not complaining), two 22x22 square scarves and two 8x54 standard scarves. I've coated all of them with cyanotype chemistry and been working on creating gifts by exposing photograms onto the scarves and totes. That requires sunlight, Thor! And lately, nothing but clouds. Today was a horrible, dark, grey day of drizzle and wet. I couldn't even do long exposures or document the ones I finished on Wednesday. I'll just have to hope that Freya is in a better mood and her day will be clearer.

Toned cyanotype scarf.
Note the pale crease down the center.
I've already learned some valuable lessons about making cyanotype textiles. The scarves, for example, are all defective. I dyed them in the active chemistry solution, but when I hung them to dry, I hung them over plastic hangers or a line of acrylic rope I strung up in a closet. Since those substances are non-absorbent, the extra chemistry gathered on top of the hangers and left a moisture-rich line across the scarves. There's a crease on each scarf where it rested on the hanger, and when developed that line leaves a pale streak across the scarf. I'm having to pull some stunts to make it less visible in the final result. Next time I'll use safety pins to hang the scarves to dry without having anything touch them. I don't have an area large enough to let them dry flat in the dark.

There has been another issue with the scarves: size. They're big and I am not really set up to deal with exposures much larger than 8x10. Even 11x14 is difficult, since I typically document my images by scanning and my scanner doesn't handle 11x14 paper. I don't have any sheets of glass 22x22 or larger, and I really don't have much in the way of backing board that size, either. That makes it rather difficult to get good contact between the scarves and the objects used for photograms, since I can't put pressure to keep them flush. In the second scarf (I've only done one square and one traditional, so far) I tried to solve this problem by exposing it in sections. I marked off small rectangles with blue painter's tape, and used black bags to protect unexposed sections of the scarf during exposure. This way I was able to expose 1-2 rectangles of scarf at a time, using much smaller glass. The finished scarf has a film-strip appearance of individual 'frames' of small groups of leaves. I was also able to cover up the moisture-crease in the scarf under one of the tape lines. I'll be doing the same for the second rectangular scarf. The second square scarf... presents a challenge that I have not yet worked out a solution for. I'm still kicking myself about a stupid mistake on the first film-strip scarf: I accidentally put leaves in the last frame upside down. Arrgh.
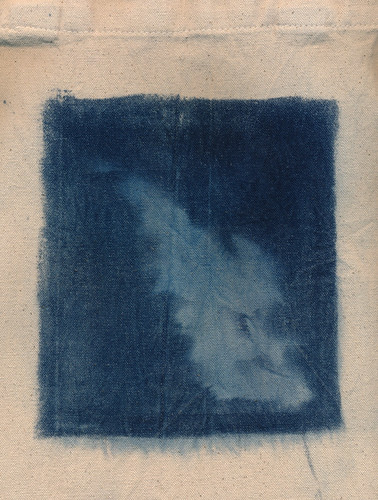
First tote. Blobby failure.

My experiments with the totes have been much more successful.
I've had two failures, both due to issues unrelated to the coating and development. The first tote I tried worked fine as far as coating, exposure, development and drying went. The problem is the plant I made a photogram of, sea oats, was blobby and the poor contact between the plant and the tote resulted in an indistinct, blurry mess of an image. Sad, but not the result of a flawed procedure. The second failure was simply because the glass I used to press the leaves down on the tote slid off and shattered, letting the leaves blow away. The result was a pure blue tote with no image left behind at all. That's what happens when your photogram object blows away during the exposure. All the rest have come out pretty much as expected.

Having fun with a failed tote
I've had some issues with staining, but I think this is due to the totes being rather difficult to wash in my regular-sized sink. If I had proper darkroom sink, or was working outside with a hose and a tray, I think these problems wouldn't be an issue. They've been fairly minor anyway. I have two totes left to expose, and I don't anticipate any issues. That should give me a final count of ten finished, good-quality totes. Since that's how many I ordered in the first place, I'm pretty pleased. The two extra totes that ended up in the order somehow have served an excellent purpose by absorbing the failure rate of the process.

Documenting textiles presents its own set of challenges, which I'll discuss once the project finishes. If you want to see the results of this project as I post them, you silly spiders you, check out my Flickr gallery: Crafts. Ignore the metalwork and felt projects, I guess. Photographing them was pretty fun, though.

Friday, November 29, 2013

Blogging for Thor: Teaching Spiders 1

EDIT: Faaaarts! This blog post took way longer to write than I expected. I swear, I started writing at 11:15! Don't smite me, Thor!

Today, for those web-spiders crawling my blog from servers based in the USA, is Thanksgiving. It's vaguely traditional that today Americans remember things we are thankful for, then tell the internet how thankful we are for them. It's kind of a way to show off the things we have, so other people can admire how much we have and how thankful we are for them.

I personally am thankful that I get to be a teacher. I'm an adjunct professor most of the time, and the rest of the time I teach at local art centers and do my own private classes. I love teaching eager students about photography, design, art and how they all come together to make the world a better place. Every time I go to work, I'm thankful that I was able to be in the right place at the right time and know the right people to get my job. In all honestly, I am not qualified for my job. I don't have a Master's degree so I'm literally not qualified. I lack the appropriate scholarly qualification. I still do a great job, don't get me wrong, but it's a minor miracle of the sentient universe that I have my position, and I am incredibly grateful to whatever agent of destiny was responsible for arranging things thus.

Instead of just saying all that, I'm going to show it. Today kicks off a new segment of the blog: Teaching Spiders. And today, my digital arachnids, I'm going to teach you how to make lumen prints. I'll be doing more of these Teaching Spiders posts, sometimes as part of my Blogging for Thor series and sometimes by themselves. Use the tag system to find them all, hopefully there will be a bunch at some point! I'm going to do general how-to's like this one, and also more specific question-and-answer. I've already done some of these (way before Teaching Spiders was a thing) for Anthotypes. I'll adjust tags so you can find them!

Now, I some time today shooting pictures to illustrate this process. Way more time than you'll think, once you see them. Partly, that's because I did it at night when it's dark and my workroom is (intentionally) poorly lit. Partly, it's because I don't have much practice at illustrative photography. Mostly, it's because I realized these steps are so simple that a monkey could follow them. Since you're all hyper-intelligent code-spiders from the interwebs, you'll be fine.

Before we start, let me make a very important note: You Can Do All Of This In Regular Light. Lumen Printing Does Not Require A Darkroom Or Light Closet Of Any Kind. Though, if you plan on using a specific pack of paper for darkroom and lumen printing, you will want to open it and remove some paper while in the dark, obviously. However, lumen printing works just fine on exposed, expired and otherwise ruined paper. I keep all my lumen paper in a box in the kitchen. I never use a darkroom for it at all. It's all been totally exposed and is worthless for darkroom printing. I care not even the tiniest bit.

Step 0: Gather the Materials
You need three things to make a lumen print: a picture frame, an object to make a print from and a sheet of photographic enlarging paper. You can have more things, some very helpful, but those are the basics. In fact, the whole 'picture frame' bit is optional. You just need something to hold your object in place on top of your photo paper. That can take a lot of forms, but we're doing a very basic lesson here. So, use a picture frame.

Step 1: Choose Your Paper
The brand of paper you choose will determine the colors of your print. Each brand has a slightly different cocktail of chemistry in the emulsion and in the paper base. These react to light differently and produce the colors of your image. Some papers are blue, others are pink, red, brown, violet, green, indigo, or orange. Pretty much any color you want, there's some brand of paper out there that will produce that shade. The best way to find out what papers you enjoy is experimentation!

Step 2: Choose Your Object
This is pretty simple. We're doing a basic lesson here, remember that Spiders, so go with something flat that will fit in your picture frame. Feathers, coins, keys, jewelry, lace, cut paper, negatives, plants, flowers, leaves, bits of string, etc. Plants tend to produce particularly interesting lumens because the moisture inside them leeches out and onto the paper. When moisture interacts with the chemistry in the paper, it makes new colors. Remember that, it can be super fun!

Step 3: Load your Frame
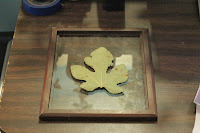
Front-Glass Regular Frame
Double-Glass Frame
Ok, this gets a tiny bit tricky. How you load the frame depends on what kind of picture frame you have. Some picture frames have two sheets of glass and no real "back" at all. These are actually my favorite kind, because then I can put the paper down first, face up, and arrange my objects on the paper easily before laying the covering sheet of glass down. I've included a photo of that, for reference. For contrast, there's also a photo of a traditional frame being loaded. Those are a bit harder, since you have to arrange your objects on the glass and then put the paper down behind them, and close the whole thing up while hoping you don't accidentally nudge anything out of place. On my regular frames, unless they have a very tight fit already, I fill the back in with paper towels or some sheets of cheap craft store felt. This ensures full contact between my object and my paper.

Full contact is very important for detail. Anywhere there is light or no contact between your object and your paper, light creeps in. This results in blurry, fuzzy areas around the edges. You may like this, since it can give the appearance of 3D form to your prints, but you should probably start off with keeping everything nice and flat. Get crazy and experimental with partial contact later.

Step 4: Place In Sunlight
I'll actually update this later with a photo, because I like using the back of my car for this and it's kinda fun. Honestly, it doesn't matter where you put your lumen print to expose, it just needs sunlight. Exposures can range from a few seconds to several hours. This is a bit frustrating for rule-oriented people who want a hard time limit so they know the print is "done", but there isn't one. A lumen print is "done" when you like the color it has turned. The longer you leave a print out, the more it will change. Some papers turn totally different colors as they expose more and more. I have a favorite paper that starts off gold, then turns ruby red, muddy brown, neon green and finally a deep emerald. It's pretty awesome, and I decide on a case-by-case basis which color I want.

So, basically, stick your lumen print in sunlight and then wait until it looks pretty. Remove from sunlight and...

Step 5: Remove from Frame
Uh, open the frame back up and take everything out. This is super-simple. Remember that your print is still sensitive to light at this point, so best do this inside and out of sunlight.

Step 6: Really, this is optional, but not for me. Document everything. Document how long the exposure was, what day it was on, what the weather was like, what kind of paper you used, what object you used and if it was a plant was it dry or fresh? Document everything. This way if you want to repeat your process you have some incredibly faint hope of doing so. Lumens are very unpredictable because they respond so closely to so many different factors like time of day, humidity, weather conditions, brightness of the sun, angle of light, moisture in the object, etc. It's very, very hard to reproduce a lumen and downright impossible without good notes.
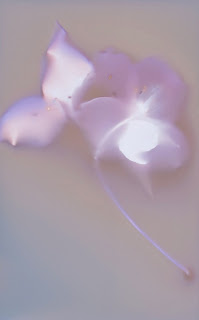
Scanned Lumen Print of a Dogwood
Step 7: Document the Image
Now take your pretty lumen print and either scan it or photograph it at high-resolution so you have a permanent image of how it looks. You may want to make several scans or photographs, and maybe use both methods. These files will be your only permanent record of the print's original appearance.

Optional! Step 8: Fix the Image
Drop the print into regular photo fixative for 5 minutes. You'll notice a dramatic shift in color and, probably, a loss of detail. Generally warm-tone papers will retain most of their color, or even become more colorful after fixing. Other papers can lose some or all their color and some or all of their detail. It depends entirely on the brand of paper. I generally do not fix my prints, except for certain papers that I've found respond really well to fixing. I'll make some notes on that in a later Teaching Spiders post.

The End!
If you fixed your image, you now have a pre-fix product in your digital files and a post-fix physical product in the print itself. If you opted not to fix, you have your files. You can keep the original print in a dark, archival box, but even heat and time will cause the print to alter slowly. Either way, enjoy your lumens and have fun!

Friday, November 22, 2013

Blogging for Thor: I Don't Know Days

It's Janelle Monae!
Sorry, Thor. I was totally blasted out after the amazing Janelle Monae concert I was at Wednesday night. It was super awesome because during the finale song, she got the audience to sit down and walked out into the crowd to finish her song. She stopped right next to me and ended up sitting on my shoulder for a while. So that photo over there, that isn't zoomed in. That's her from zero inches away, because she's literally on top of me. It's crazy. Then I had my friend that came to the concert with me spend the day, and it was fun. I was so tired that I actually passed out and didn't recover until after midnight.

Anyway. I also got some experimenting done before the concert. I wanted to test some of my theories regarding the use of textured acrylic. I painted the acrylic with black paint and rubbed it off, leaving only the recessed areas covered in paint. This way, the patterns in the acrylic were much more pronounced and produced a far stronger shadow on the lumen print than the un-painted acrylic did. The result was about what I had hoped for originally. You can see the first test, here to the right. The lack of pattern around the lower left corner is due to the acrylic not being held down evenly. I'm going to cut some 8x10 sheets so I can place them in frames. Cutting this kind of acrylic isn't hard, but it isn't very easy either. It likes to fracture unhelpfully, so I'm going pretty slow and trying to take a lot of care.

After checking to confirm that my modifications to the acrylic would work properly, I tested the painted acrylic on a real print. The results are here, seen to the left. Again, the same issue in the lower left corner. Incomplete contact with the acrylic. I like the results for adding texture to the background of the image, but I worry about how much detail may be lost due to pattern interference on the leaf itself. I'll have to do more exposures and check the results. Still, this has been very encouraging!

Thursday, October 24, 2013

Blogging for Thor: Lumen 150!

Today I printed my 150th lumen. Well, at least my 150th lumen. I'm not exactly sure, because I made some tests that just didn't come out, or I did demos and never recorded them. However I've now made at least 150 lumens and have 150 in my archives. So that's a pretty big milestone. I might not be able to match the thousands of John Fobes, who has two different Flickr galleries because he hit a hard cap on one gallery! Still, I'm pretty happy with hitting 150.

These are two more of my lumen prints using Liquid Light painted onto parchment.  I even have a sheet of black parchment that I originally didn't think I'd have any use for. You can't print a cyanotype or anthotype on black, so I didn't think there'd be anything to do with it. I'm really excited to see what comes out, I'm just looking for a good leaf to use.

Coating still presents a problem, because even multiple thin layers are still showing considerable bubbles and streaking. Fresh foam brush and everything, working from a completely liquified emulsion, but still not a smooth coat. I'm not sure if that's simply a result of applying the emulsion to parchment, but I think it's just me being bad at coating. Hopefully my coatings will improve with practice. Despite the bad coating, I did get photographic-level detail on Lumen 149. Check it out!

I am a little sad that these thicker coats also seem to result in darker, blander backgrounds. I'm gunna do some experimenting, but the backgrounds turned this violet-black color almost instantly upon exposure to the sun. None of the cloudy cyan-lilac-pinks that showed up when doing quick exposures on single-coated vellum.

Thursday, October 17, 2013

Blogging for Thor: Liquid Lumenation

Lumen print on vellum,
3 hour exposure.
I was recently able to obtain some Liquid Light, which is a liquid photographic emulsion. It comes in a thick, gelatinous white fluid. The idea behind Liquid Light is that you can paint it onto almost any surface. Wood, ceramic, metal, glass, bone, cloth, whatever. It's a really fun concept and I've seen it used quite well by some other photographers. They were using it as intended: for exposing traditional photographs onto non-traditional surfaces. I'm less interested in that than using it for Lumen Prints!

You're supposed to heat the gel by sitting the bottle in hot water, but then it melts down into a runny, milky liquid. I'm still trying to get the emulsion to a medium consistency where it's spreadable, but still tacky and thick. It does not like sticking to metal, though I had some luck with glass and more luck with vellum. I'm trying to ponder other possible substrates... I do have some bones laying around....

Lumen print on glass, scanned with
a black background.
My first attempt was on a small piece of glass, 2 inches square. It's from a very tiny picture frame that I wasn't planning on using. I didn't heat up the emulsion before applying it, so it didn't spread very evenly. That was compounded when after the exposure, I had to wet the surface to get some residue off the back where the emulsion had glued the glass down to the cardboard surface I was using to coat on. The emulsion started to come off before I could hair-dryer it back into place. The final result isn't bad! The glass sheet has, however, now deteriorated. I tried coating it with a UV-resist spray to see if maybe I could display the glass in its frame... and no. No, that didn't work at all. Now I have a solid maroon sheet of glass with an interesting texture. I might be able to sand off the emulsion and try a new image, though. Sanding the glass would probably help the emulsion stick better next time.

Lumen print on roofing tin
After the glass, I attempted several times to get a good coating applied to some sheets of roofing tin I had left over from a tintype workshop back in college. This time I did heat the emulsion and it ran like water, sheeting right off the metal. That was rather infuriating. I ended up dumping a good 20-30 milliliters of emulsion down the drain, I couldn't get it to stick to anything. I finally did get a coating onto a sheet of the tin, but only by using fully cooled emulsion and even then it was patchy and streaky. Ugh. I know that you can get liquid emulsion to stay on tin! I've done it before, I have SAMPLES! I have to figure out how to heat the emulsion to the correct consistency so it's sticky enough to stay on the metal, not just sheet off, and not clump up. While I enjoy the streaky appearance, I want to get the same level of detail in these Liquid Light lumens that I get in paper lumens. I don't see why that would be impossible, since I know that Liquid Light can reproduce photo-quality prints when used according to standard instructions. My coating just needs to get better before I'll be able to reach that level of clarity. I might talk to some people like Aspen Hochhalter at UNCC or Phil Moody at Winthrop, both of whom have experience with liquid emulsions. I think Laurie Schorr might have some too, I'll have to ask!

Lumen print on vellum,
3 minute exposure.
Lumen print on vellum,
3 hour exposure at dusk.
The most recent tests I've done with the Liquid Light are on vellum. I ordered a whole new pound of scraps from the nice folks up at Pergamena and haven't felt very Cyanotype-ish lately. So, why not use it for lumens? Some very fun results so far, and I'm going to try double coating the vellum next time, as well as pinning it down like I do when coating for cyanotypes. These three first tries were completely covered coatings, like my earliest cyanovellums. It's really, really hard to tell when you've fully coated a sheet of vellum with the Liquid Light, though, because the vellum just soaks up the emulsion and leaves no color behind. Cyanotype chemistry stains the vellum yellow, but this stuff is virtually clear. You can only tell by seeing where the shiny-sticky residue remains, and that isn't always easy in low-light environments. I may have to start working under brighter conditions and screw premature exposure. There certainly is a lot more color variation in the lumens on vellum than on glass or metal.

If you're interested in seeing bigger scans, you can view the full-size images on my Flickr! They're tagged "liquid light" if you're viewing this blog post... from the future!

Monday, October 7, 2013

It'll Change Your Life

This is a direct follow-up to my last post, Whittling, where I talk about my experiences trying to introduce my students to alternative process photography. It came across pretty bleak, according to various readers. There was some good discussion on Facebook, in the AlternativePhotography.com group, but again it seemed like folks were getting a very negative impression.

So, let me clear a few things up. I am not really discouraged by my results in teaching alternative processes. I teach them to my university students, I've done adult workshops for the Light Factory and been a visiting artist doing demos. No matter which group I'm teaching, I get basically the same results and reactions.

My students love alternative processes. They think the lumen print is magically amazing as the paper changes color right in front of their eyes. After just a few minutes in sunlight, they have ghostly images that came to life in full color. Cyanotypes are hands-on, easy and fast. Watching your first cyanotype develop is awesome, and everyone ooooo's when that cap of hydrogen peroxide finishes the development in a splash of midnight blue.

So why was I talking about how my students aren't going to continue using the knowledge I give them, and comparing alternative processes to archaic hobbies like whittling, baking and sewing? Well, because that's all true. My students enjoy the workshops and demos. They enjoy learning something new, and getting a chance to try something fun and out of the ordinary. During the demos, they're having a blast and really getting into things. They like coating the paper, get excited thinking about what they'll use to make their exposures. They like seeing the cyanotypes develop in the water, or peeling off the leaves to reveal their lumens.

I really enjoy doing my demos, workshops and lectures. It's just as much fun for me to show people new things, watch them have fun with chemistry and light, show off skills that are rare these days and maybe plant some seeds of further interest.

What I was talking about in the last blog was that after the demo or workshop ends, my students go back to their everyday lives. I don't get requests for further information, or emails asking where they can buy the chemistry to make their own cyanotypes. No follow-ups asking for good places to buy darkroom paper in order to make their own lumen prints. No questions about what kind of plants work best for anthotype dyes. It's possible that some students just google all that on their own and might very well be out there printing up a storm, but I don't think so.

There are blacksmithing demonstrations at the Renaissance Faire, and they're super-fun to watch. Despite that, there are not many blacksmiths. It's pretty awesome to go to a workshop or gallery class and glaze a clay pot. That doesn't mean you're going to become a potter. There are only so many hobbies a single person can have. Even simple ones that don't require a big investment of money or time (like the basic alternative processes) still take an investment of mental energy. Many folks just can't make that commitment. They're into paintball, soccer, World of Warcraft, Dungeons & Dragons, playing instruments or blogging about the best kind of plants for a semi-arid environment.

Personally, I took two courses in metalworking and became almost decent at basic silver- and copper-smithing. I truly enjoyed metalworking, and if I was given a chance to attend a workshop or demo, I would. However, I don't do metalworking in my spare time, even though I certainly could coldform copper pretty easily. I also very much enjoy experimenting with clays and dyes, even textiles. When given a chance to try something new out related to those interests, I do it. At some point, I plan on learning to make ragdolls. I'm not going to become a sewing expert, though. I'll probably never buy my own sewing machine.

Why is it so hard to get people interested in alternative processes? It really isn't. It's easy. They're awesome and fun, simple and pretty cheap. The hard part is changing someone's life so that alternative processes become part of it. Not everyone who goes scuba diving becomes a scuba diver. Not everyone that goes on a camping trip becomes a weekend camper. We, as people, generally enjoy trying fun new things. We even retain the knowledge of how to use them, and might occasionally want to do them a second or third time. What we don't do is incorporate them into our lives as cornerstones of how we express ourselves or spend our free time and disposable income. That is a big, big change to make in your life and such changes don't come along often.

So I don't despair when my students don't become alternative process enthusiasts. I don't expect them to. It'd be super awesome if one of them did, but that may not happen for years. It's already pretty rare that any of them become photographers, much less a particular type of rare and archaic photographer. That isn't bad. They're doing other awesome things, like growing flowers or riding bikes, or shooting people with paint.