Friday, September 5, 2014

Blogging for Freya: Formulas and Funds

I've been busy this week, preparing for a show in Asheville. I'm displaying my parchment and bone cyanotypes up there, at the Silverspace Gallery. Today, I head off to meet Bridget Conn, the director of the Asheville Darkroom, to do the installation. Working late last night on paperwork and framing is why I missed Thor's deadline. But, in honor of Freya and Freyr, I've got a short post for my Spiders.

Artists make money by selling their work, either directly to customers or by using galleries and shows to gain exposure. In the latter case, the gallery generally charges a commission on sales. That commission is a percentage of the sale price, which means the artist has to pass that charge on to the customer, building it into the final price of their work so that they receive fair pay for their labor, materials and training.

It can be a bit confusing, trying to figure out what to charge for your work. There's a whole blog full of entries about how to price your work, but most of those are issues related to your exposure, your expenses, your effort and other things. Specifically, I'm talking about how to calculate the final sale price of work so that the gallery gets their commission and you get the amount you want back from the work. Here's the formula.

X = Y / (1-0.Z) where X is the final sale $$, Y is how much $$ the artist wants to make and Z is the commission rate!
If commission is 30% and you want to make $100, then the final sale price is $142.86. $142.86 = 100 / (1-0.30). Pretty cool, right? I had some help working out the formula, a friendly computer programmer offered mathematical guidance. Now, I pass that on to you, Spiders. Go forth, and sell!

Thursday, August 28, 2014

Blogging for Thor: Dem Blue Bones

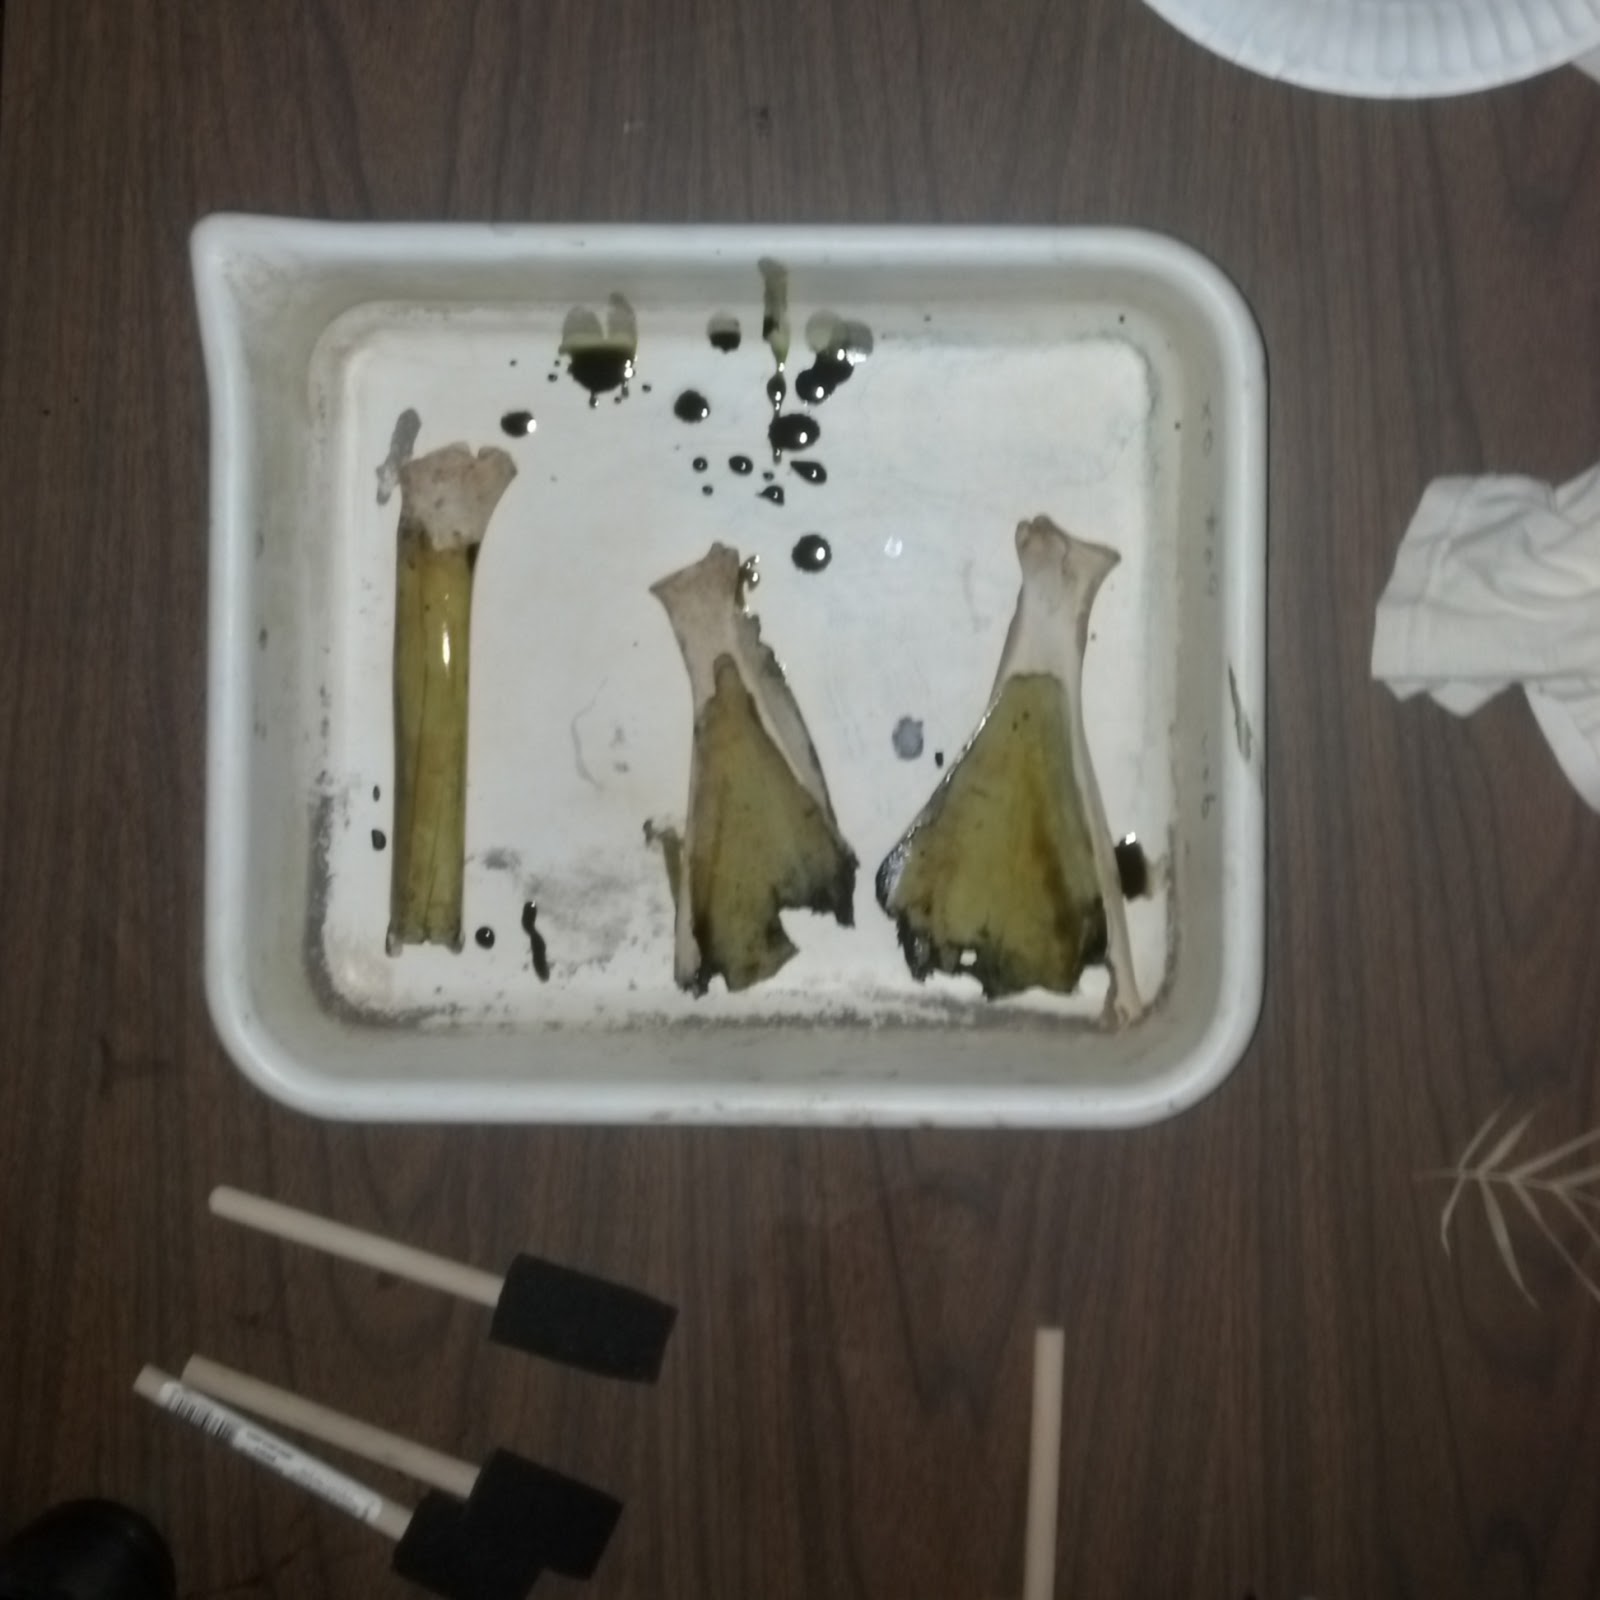
Shoulder #1 -- My first real success at printing on bone!
Hello, spiders! Exciting news!! I've been meaning to try printing cyanotypes on bone for a fairly long time, but it was only within the last week that I finally got some appropriate bones. One of my friends goes hunting with his family, and they just toss the bones and other scraps in the woods for scavengers. He was kind enough to go digging around the woods where they drop the bones and found me three scapulae and half of a femur. The results are very encouraging, and I'm hoping to get more bones to print in the future.

In addition to the bones, I also had a single deer antler to test out. Last semester, one of my students offered me some antlers that she was using in a biology experiment. She'd taken core samples from them to do analysis on, leaving most of the antler perfectly intact. She didn't need the remainder, so she gave me several antlers that I could test on. I coated one of them months ago, but never got around to exposing it until this week. There are more antlers, hiding somewhere... I'll have to track them down eventually.

In-Progress Author's Note: Whew! This post is ending up a lot longer than I expected, and it doesn't even have any pictures added yet! I'm breaking it into sections. Don't worry my Spiders, I just said sections, not different posts.

Cleaning the Bones
This is actually something I'm more worried about in the future than something I had to deal with in these tests. The bones given to me were weeks or months old and had been laying out in the woods. Scavengers and nature had already done the cleaning for me. If you end up having to clean your own bones from something fresher, like a Thanksgiving turkey, then this guide might be helpful. It's written by some awesome little kid that loves collecting skeletons. Rock on, creepy little dude.

Seriously, listen to him when he says stuff stinks. I was foolish enough to try boiling some turkey bones from a Thanksgiving turkey (what, you thought that was a random example?) a few years ago and my entire apartment stank for days. Never again. Next time, I'm stuffing the bones in a bag, tying the bag in a tree and letting nature have at it.

Coating the Bones
Coating is messy work.

The antler coated much more easily than the bones, but both surfaces required several coats of chemistry to achieve a decent stain. Even though bone's theoretically porous, the surface is not very absorbent. Coating took a good while, since I allowed each coat to dry partially before applying the next one.

As I said, I coated the antler months ago, so I don't remember precisely how long I waited between coats, or even how many I applied. I do remember it was several, though. It was kept in a dark box, sitting on a metal grate, so it could dry thoroughly. A few days of drying turned into months because I just couldn't figure out what to print on it. I'm still not super happy with the antler, but at least I know the general theory works, if I can find the rest of the antlers from that bag. I've put them somewhere in my lab and just can't figure out where. Don't you hate when you misplace body parts, Spiders?

On the first scapula, pictured at the top of this entry, I applied several coats of chemistry, allowing each one to soak in as much as possible before adding new liquid. The first few coats were allowed to set overnight, then I added some more the next morning before finally exposing the bone to sunlight. I'm not sure if it was just the sheer amount of chemistry applied to that first scapula, or if it was allowing a longer drying period, but the  the color on it is much deeper and truer than the later tests.

The other two scapulae and the femur got fewer coats and less drying time. I'm not nearly as pleased with them, so next time, I'll be more patient and more generous with the chemistry. Still, they're perfectly acceptable results, just not as really nice as the first one.

I also tried soaking a knuckle bone in cyanotype chemistry (one good soak for about 2-3 minutes of sloshing and swirling) but that didn't come out at all. The rounded shape did not prove very easy to adhere a plant to, so the image is almost invisible. A majority of the blue color also washed right out of the bone, leaving only a dingy blue-grey. Not real happy with either the color or the image, so I'm probably not going to be doing much more with the rest of the ankle, knuckle and joint bones I have.

Printing the Bones
Packing tape to the rescue!
The biggest challenge of printing on a substrate like bone is getting, and keeping, tight contact between the object used in the print and the surface of the bone. Bones aren't flat, and even if I could balance a sheet of glass on them somehow, pressing down with a solid object wouldn't give me good contact. So, after very little thought or consideration, I used clear packing tape to hold the leaves in place against the bones. It seems to have worked rather spectacularly well on the mostly-flat bones, and even on the antlers. The packing tape did not work well on the almost-round knuckle bone, but I don't think anything could have.

This just didn't work.
In the second set of bones, I ran into a small problem with the tape. Using a fresh leaf created a kind of miniature green house effect, where the moisture that sweated out of the leaf beaded and gathered under the tape. The evaporated moisture created a small bubble and made the tape lose a lot of stickyness. I lost a bit of contact and got some image fuzz as a result. In the future, I'll stick to dried plants for bone prints.

After taping the bones up, I exposed them for a few hours. About 2 for the first set (the antler and the first scapula), then I went up to 4 hours for the second set (femur, other two scapulae and the knuckle). Again, despite a much longer exposure the second set was never as bright or deep a blue as the first set. Coating was the issue there, not exposure. Both sets were out in direct, bright, hot sunlight.

Washing the Bones
I just dumped the exposed bones into a big tub of water and let them soak for about an hour. Afterwards, I hit them with a bit of hydrogen peroxide. The first scapula reacted fairly well to the hydrogen peroxide, forming the intense blue color seen in the photo, but none of the other bones showed any reaction at all to it. Their blues did become slightly darker and more true after drying was complete, but overall they look much the same as they did once washing was complete.

As a warning for any Spiders that want to do their own cyanotype bones, you are generally not going to get any kind of idea what the final result is going to look like just by looking at the unwashed bones. The washing and a nice long soak is necessary to allow the image to develop, much moreso than for a traditional cyanotype.

Shoulder #2 -- Second success!
Drying the Bones
I honestly didn't have to do much drying or final cleaning. It's been so hot here lately (90s and up) that I just left everything outside in the blazing sun for a few hours. They're ...heheh... bone dry now, and looking great. There's a tiny bit of tendon left on one scapula, but it doesn't smell at all, so I'm not going to mess with it.

There you have it, Spiders. It's entirely possible to print cyanotype images onto bone and horn. It's not even that hard! You can find more photos of the bones and antler prints on my Instagram (I have an Instagram now!) and, soon, on my Flickr.

Thursday, August 21, 2014

Blogging for Thor: Photographic Typos

A friend sent me this article last week and it's pretty cool all by itself. I'm relinking it here because it isn't just relevant to typos. This quote really sums things up:
We don’t catch every detail, we’re not like computers or NSA databases,” said Stafford. “Rather, we take in sensory information and combine it with what we expect, and we extract meaning.” 
That isn't just true with typing. It's true with all perception, especially visual. That means it's true for photography. As photographers, we see in our cameras what we expect to see in our minds. It's easy, especially when you're first starting out, to mentally blank out everything but your intended subject. Not notice the light socket in the background, or the lamp growing out of your subject's head. Not notice that you're out of focus, not notice this shadow or that power cord. It's so, so very easy.

Writing may not be easier than photography, but it does tend to have a bit more time. Even if there isn't an editor specifically checking your work, you may have time to allow your brain a few hours to dump all its expectations and review your work fresh. Remember in high school, being told to wait a full day between writing a draft and editing it? I hated the idea, but it often worked so well.

Generally, as photographers, we don't have that time. We're expected to finish an entire shoot in a few hours, and may not have a chance to re-do the shoot to correct mistakes. So it's vital that we teach ourselves (and our students) to look at what is actually in the picture. Try as much as possible to force yourself to see reality instead of expectations. It's not easy, because your brain is fighting you the whole time. That isn't how it's wired. It's a difficult skill to master, and no one can do it right every single time. But even trying to do it is a great achievement. It puts you leagues beyond most camera users. Visual awareness is probably the single thing that defines a good photographer. It's knowing exactly what will be in your photo. If you can't get it down before you shoot, you're still doing well to be able to review your photos and notice the unintended contents or mistakes on the second pass.

If you can tether, or load your photos onto another device for review during a shoot, do it!! Just as the article mentions that you can improve your proofing results by printing out or otherwise re-formatting your text, you can get the same improvement by viewing your photos in another manner. Even aside from that, it's just hard to do a good job reviewing photos on the back of a camera.


Well, spiders, that's all for this week. I'm probably going to miss next week, but I'll try to write an article early and get it up via auto-post. I might have the same problem week after that, too. Next weekend is Dragon*Con and the week after, I have a solo show up in Asheville that I've got to prep for. It's a busy month, spiders. I'm stressed and excited about everything.

Thursday, August 14, 2014

Blogging for Thor: Too Alternative?

I don't enjoy feeling like a hipster, but I end up feeling that way quite often. Talking to non-specialists about my work is often not an enjoyable experience. When I say I'm an artist, the natural question is what kind of art I make. So I explain that I'm a photographer. Their eyes light up! Photography! That's something anyone can do! It's so easy and relatable! They do photography! They have a camera, they take pictures. They understand me!

What kind of photography do I do, they ask, eagerly. That's where it stops. They expect an answer like "landscapes" or "portraits." Instead, I do alternative processes. Not even 'normal' alternative processes like wet plate collodion, which at least uses a camera. Nope. I use lumen printing and anthotypes, which even most photographers have little or no familiarity with. My subjects are leaves and flowers, but they aren't rendered in the familiar way. My work isn't accessible.

So what can I do? I explain that I do alternative process work. Blank stare. I say some words like "contact printing" and "cyanotype" or "non-silver processes"... and more blank stares. At best, there's a flicker of interest and maybe they ask how it works. Another stab in the gut. Explaining alternative processes has two possibilities.

1) An in-depth explanation of light sensitive materials, chemistry, paper treatments and different printing materials. This often results in vacantly blank stares.

2) "It's magic!" Which often results in laughter (forced or real) or in slightly offended looks. It's just one step above the true hipsterism: "You wouldn't understand it."

I have had some interesting discussions with regular (anyone who isn't an alternative process photographer) people about my work. I've had fun talking about my work with them, but it's a halting, slow conversation and far more often I find myself trying to avoid discussion about my work because of previous experiences.

It's just something that bugs me. I get people that say my work is colorful, pretty and interesting. I get compliments and questions, I do. I like that. I love doing my work. It's just a bit of a bummer that the stuff I really love, the chemistry, the records, the experiments, the trials... that's not something I can have easy discussions about. So for all you academics out there looking for someone to talk about pre-Roman Gaulish culture, or the architecture of ancient Sumeria... I feel for you. I really, really do.

Also, I totally love ancient Sumerian architecture. Let's chat!

Thursday, August 7, 2014

Blogging for Thor: The Life and Times of Salt

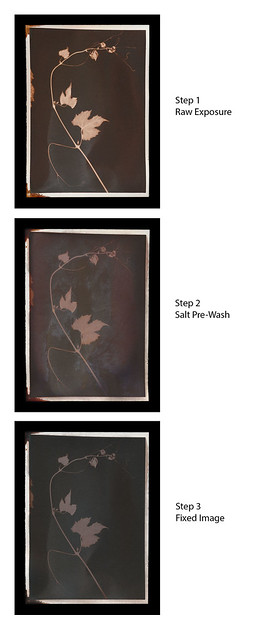
Sensitized salt paper
24 hours after coating
I have discovered a flaw in my approach to salt printing. Time. I was assuming that as long as the salt print was kept in a dry, dark location, it wouldn't expose quickly. I could coat a decent sized batch of sheets one night and then wait for good weather to use them.

Wrong.

Even waiting a full day after applying the silver nitrate was too long. I opened the door of the cabinet where I was storing the paper and found this.

Print on fogged salt paper
All five coated sheets looked the same. I tried printing them anyway and both images made with negatives are so distorted that they're basically invisible. I did get a passable, in fact quite interesting, result from a contact print of a Mexican Heather sprig. The spotting and patterning becomes even more visible during the exposure. And for some reason, despite using kosher salt, these prints came out deep violet splotched with black and pink. Not at all the reds and browns I was expecting.

So, from now on, I'll have to dry the silver-coated paper fairly quickly and try to use it the same day. Or at least coat during the evening (as I do now) and use it the very next morning. I might even try using a hairdryer to accelerate the process so I can coat and print within an hour or two. It's just a bit of a bummer that I can't store the paper. Anthotype paper keeps basically forever if it's out of sunlight. Cyanotype paper keeps for a few days before it begins to fog too much. Salt prints, though, just won't keep for more than a few hours. Bummer.

Lesson learned, y'all!

Friday, August 1, 2014

Blogging for Freya: Fiber and Plastic

While it's entirely possible to create a lumen print on non-traditional surfaces by using liquid photo emulsion or an alternative process like cyanotype or salt printing, most lumen prints are made on photographic darkroom paper.

Darkroom photo paper comes in two forms: Resin-Coated (RC) and Fiber-Based (Fiber or FB). There are pro's and con's of both for normal darkroom printing that have been covered in-depth by dozens or hundreds of different photographers. Lumen printing, however, is not traditional darkroom usage. There are some different reasons you may want to work with either RC or FB papers for your lumens.

First off, remember that lumen color profiles vary by the type of paper and, yes, that includes a difference like RC vs FB. Not always significantly different, but different. Some brands might vary to a considerable degree, but all of them will vary at least a bit. So one thing you have to consider when making your choice is simply if you care. Maybe the specific colors you want don't come from RC, or can't be produced on Fiber. In that case, this guide will just help you deal with the downsides of that particular material.

Friday, July 25, 2014

Blogging for Freya: Salting Spiders, Part 2

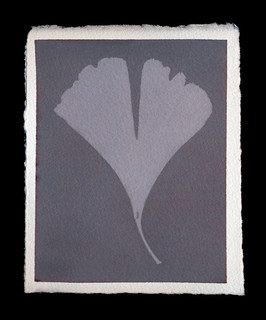
Print made with lite salt
Hello, Spiders! Welcome to part 2 of my Salt Print learnable. You're in for a treat, because this is the full-length version and it took forever to write.

Set-up
You can do this process almost anywhere, but you're going to need a flat area to work. If it's an area you care about, first cover it in a plastic tablecloth or protective sheeting. The plastic prevents the nitrate from soaking through a towel and getting on anything important. However, the nirate can slide around on plastic, so to be extra super careful you could put towels or a cloth down on your plastic.

Make sure you have your gloves (to avoid black spots on your nails and hands) and your protective glasses (to avoid eye damage) in place. You don't need to actually put them on until you take out the silver nitrate. I don't 'suit up' until I'm ready for the silver nitrate coating, because the gloves make my fingers clumsy. I always wear my glasses, because without them, I can't see. I have little plastic additions to my glasses that clip on to provide extra eye protection. Goggles just fog up on me and hurt my face. Whatever method you use to protect your eyes is up to you, but it is kinda important.

And that's it, you're ready to go. Protect the area, protect yourself, and get ready for some printing!
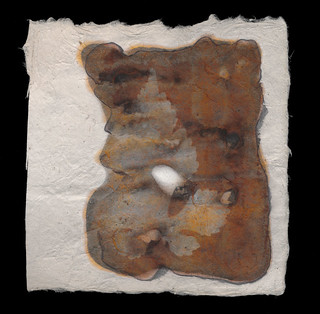
Print on Lokta Fiber Paper
Paper
Select your paper. As with most alternative processes, you want a high-quality printmaking or watercolor paper. I've had great luck with Arches Aquarelle and Rives BFK. Others have recommended Crane Kid Finish, Bienfang or pretty much any cotton rag paper. If it works for cyanotypes, anthotypes, van dykes or other alternative processes, it's probably great for salt prints.

Personally, I prefer smooth surfaces with just a bit of tooth. Too much texture in the paper and it starts removing detail from your print. Too smooth a surface just looks bland to me. I like a nice medium. Hot press papers are generally great for this.

You generally don't need to size your paper, but a simple gelatin sizing may be helpful if you are experiencing significantly less contrast than you expect or desire. To do a gelatin sizing, simply mix up unflavored gelatin (Knox seems the most common brand around here) in hot water and soak the paper in it. Allow to dry completely, then proceed to the next step.

Small note: handmade papers or exotic papers may be too absorbent to use for this process without sizing. I attempted to use some Nepalese lokta fiber paper and it's basically just a rag made of cellulose. I wasn't able to spread the silver nitrate at all and ended up using way too much of the chemical because it had to absolutely saturate the paper. If I experiment again with this paper, I'll be using sizing. I had similar issues with cyanotypes and anthotypes on hand-made paper using dryer lint and shredded recyclables. 
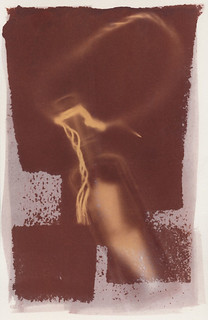
Print made with sea water
Salt
You'll need to make some salt water. The amount of salt in the water is entirely up to your discretion. It's perfectly viable to use seawater. Normally I add about 2 teaspoons of salt to a liter of water. Less than a 2% salt solution doesn't give very much of an image at all. That's basically the minimum required. I have been told that the more salt you add, the more contrast you'll see in the final image. I have not seen a significant difference myself.

You can use chemical grade sodium chloride (additive-free salt) and distilled water. There's no need to use pure chemistry, though. I don't use distilled water. I generally use tap water that I know is absolutely not pure. The pH is on the basic side, it's hard water with a lot of calcium and iron. It works fine. Sea water works fine too and who knows what's wrong with that stuff. Rainwater is fine. The type of water you use, as long as it's not actually contaminated with heavy metals or something, won't produce a big difference in your prints. Minor differences, sure, but not huge ones.

The type of salt you use will dramatically affect your prints. I like using "lite" salt. That's a mixture of 50% sodium chloride and 50% potassium chloride. The important part of the salt is chloride, since you're using it to convert the silver nitrate to silver chloride. Silver chloride is far more reactive to light and produces a much stronger image than silver nitrate. How you get the chloride in your paper isn't important to the light-sensitivity, but it is important to the color. I haven't experimented with ammonium chloride, but I know it can also be used for salt prints.

Lite salt produces violet images that, when fixed, turn pale yellow. I have not bothered tracking down any pure potassium chloride to test what it does, but I imagine it has a slightly different effect. My kosher salt images are red to brown before fixing and turn brown or black after being fixed. Prints made with sea water from the Florida coast have produces a nice middle ground
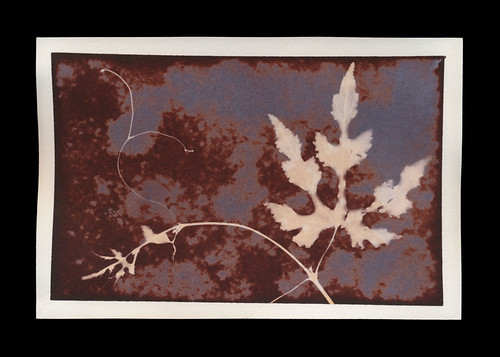
Print made with both lite and kosher salt
Here's a cool tidbit: if you put different types of salt in your water, they don't always mix. The result can be a splotched print that has some areas of the paper coated in one type of salt and the rest in the other. It can be a very fun calico effect. I've gotten especially stunning results prior to fix, using half lite salt and half kosher salt, to get a violet-red combination. Don't underestimate the appearance of the post-fix combination of red and gold from the same combination, though. It's pretty awesome, too.

The basic step here is to mix up your salt water and then soak your paper in it. As a faster alternative, you can simply paint the salt water onto the paper with a brush. Either way is fine!

Silver Nitrate
It's time to put on that protective gear! Get your gloves and glasses firmly in place. Once your salted paper is bone dry, paint on your silver nitrate. Do this in low light to avoid fogging the paper or the jar of silver nitrate. I know it's in amber glass, but better safe than sorry. When not in use, the glass of nitrate should be stored in a dry, dark place. I work at night, with a dim lamp or computer monitor as my light source.

Use an eyedropper, pipette or other method to drag a thin line of the 15% silver nitrate liquid across the top of your sheet of paper. Then you can spread it out into an even coating using a foam brushhake brushglass puddle pusher or even just a regular flat paint brush.

Getting an even coating can be tricky, because until it exposes, the silver nitrate solution is clear. It can be very difficult to see if you've left any streaks, brushmarks or spots behind. I recommend simply doing two or three light, even coats across the entire surface going in different directions. If you want an especially dark image, you can apply two heavy coats of silver.

Exposure
As with most of my guides, I simply suggest using a picture frame to expose your prints. It's cheap and easy to obtain. Head to your local art supply store, or even the local Target, and grab some inexpensive picture frames that have a hard back. Don't get the really cheap ones with the hinged cardboard back, they're just not sturdy enough to provide good contact between your negative (or object) and the coated paper. I'm going to go into extreme detail on different methods of exposure in a future post.

Since the salt printing process is a "printing out process", it develops while it exposes. You can test exposure simply by looking at a portion of the exposed silver that isn't covered by your negative or objects. When it reaches a density you're happy with (generally dark rusty red or brown), you're done!

Fixing
Now, it is possible to simply treat a salt print like a lumen print and avoid fixing it. However, that isn't traditional and the salt print is a very traditional process. It's also a lot more tactile than the lumen print, so I do generally fix my salt prints. An unfixed salt print, like most unfixed prints, will continue to darken and expose in even standard interior lighting.

To fix a salt print, you can mix your own fixer (difficult and annoying) or use standard photo fixer. Guess which approach I favor? That's right, the standard photo fixer. I use Sprint Rapid Fixer, because that's what I can borrow from the university. It's also what I've used for my entire photographic career. I dilute it heavily, about 20ml of concentrate to a liter of water, meaning it's at 20% of the regular working strength. You do not want stronger fix; it will bleach your prints. Even using the weakened fixer, only fix for 1-2 minutes at most. That's more than enough to fix the image. Again, over-fixing will bleach your prints.

Spiders, you should be aware that fixing a salt print does cause a potentially dramatic color shift. I mentioned earlier that the violet images produced by "lite" salt will fix to a pale yellow. The ruddy reds of kosher or regular salt will fix to a duller, darker red or (with high levels of silver) to an almost black brown. I generally prefer the pre-fix image, but not always. So I scan both before and after fixing.


That's all I've got, Spiders. Between this post and the last one, you should be ready to sally forth and print as long as you've got sun, salt and silver!